|
As we make the transitions to teaching yoga classes online, it’s important to do it well. It’s easy to make a rookie mistake and lose your audience. Whether you are streaming or recording, here are five practical and simple tips for teaching online yoga classes that will make a huge difference in the quality of your offering. Although these tips are designed for live streaming (as we’re not discussing editing yet), they are also useful for those of your who are recording. (For specific tips on livestreaming, check out, “How To Livestream Classes.”)
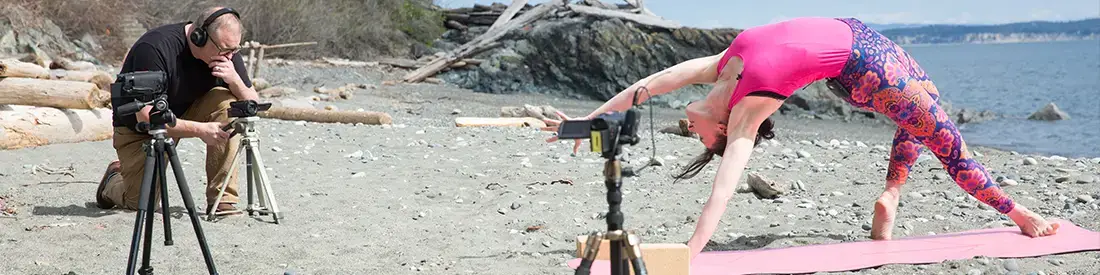
Teach with a clean, spacious, uncluttered background. If you check out our DoYogaWithMe Videos, you’ll see that we take a lot of care to make sure that the background is clear and free of clutter. This is easy to do; pick a wall in your house that has a good amount of space (ideally you want a clear horizontal stripe of at at least 10 feet), then move everything away. You usually won’t teach with a window in the frame because of lighting issues (see point #2), but it really depends on the orientation of your window. I prefer light or white walls when possible to create a clean, airy look. Usually you’ll place your mat horizontally along the wall. A small altar space or nice wall hanging/painting can work, depending on your space. If you have a tripod, outside can work, too.
Key Points:


When you shoot, make sure that you don’t have light behind you because it will flood the camera’s sensors and may make you look dark. For this reason, you usually won’t teach with a window in the frame behind you, unless you are sure the light won’t blow out the camera (exceptions: on YouTube, YogawithAdrienne teaches against a window and it looks great). For this reason, you often won’t put a bright lamp in the frame with you, as it may cause you to look darker. You want to be well lit from the front and sides. Natural light can be amazing (if you are opposite a window), as long as you’re teaching in time when the light won’t change dramatically. Although I’m frankly a fan of warm lighting, “daylight” LED lights mimic the sun most closely, so you pop a few of those lights into your house lamps and see how it looks. Newer mobile phones (like the IPhone 11) have amazing cameras and light sensors that can accommodate a wide variety of environments. In yoga, we turn a lot. So before you shoot, do a test shoot in the space where you practice a few differently facing poses to make sure that you don’t go dark when you turn a certain way.
Key Points:
Audio is where most videos fall apart, and this is where you may need to make an investment if you want to do this long term. When students practice with you, their key connection is not visual; it’s audio. Bad audio will be very distracting and cause them to tune out.
There are two key problems: live rooms and teacher movement.
Problem 1: Live Rooms
If you are in a room that is very “live” – ie you have a lot of hard surfaces – the sound will echo and sound poor. It’s very hard to fix after the fact. (Check out my early YouTube videos for a demonstration of this problem). To fix a live room cheaply, take all of the pillows in your house and pile them on hard surfaces to buffer the sound. Hang blankets on walls out of sight of the camera. You want to room to be as “dead” as possible. You know how sound studios have foam stuck to the walls and ceilings? You can also go get some foam padding from Home Depot and put it all over the place. Do a test with your camera to assess your sound before your record or livecast.
Problem 2: Body Movements
Teaching yoga is different from most livecasting in that you need to move and face a bunch of different directions. For this reason, your audio will change (because you’re not always facing the camera). In an ideal world, you use a microphone on your actual body (bonus: this usually eliminates Problem #1 – the “live room” issue- yay!).
Cheap solution: To solve this sound cheaply, use your wireless headphones, like your Apple Air Pods. The bonus is that these will connect directly to your IPhone, usually eliminating challenges with connecting your audio to your phone. Sure, you’ll have them stuck in your ears, but people will be able to hear you clearly.
Investment solution: I use a Sennheiser Wireless Lavalier.

At around $500 USD, it’s an investment, but worth it in the long run. You can hear that there is a huge difference in sound in my newer videos where I’m moving.

While there are mics out there that will connect directly into your IPhone port (via a lightning port), by getting a simple adapter you can vastly expand your option. The adapter (note the three rings around the plug rather than two) is called a TRS adapter) and it will connect your mic into the headphone jack of your IPhone (or more accurately, it plugs into the headphone jack IPhone adapter that you’re probably familiar with).

Using this adapter is not hard, but if you get the wrong one it won’t work. I’m also going to point you in the direction of an amazing resource over on YouTube: Primal Video. They are tech gods with lots of goodies. Here’s a video specifically on mics for mobile phones and adapters if you want to dive into this issue further.
Note on music: to keep audio simple, I’d recommend having your students play their own music (or – fun solution – create a Spotify playlist that is directly catered to your class and prompt your students to start it from home during the class) rather than trying to feed music into your live recording. To start, keep it simple.
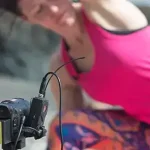
And pro tip: if you’re using a mic, the sound is being picked up very close to you (like on your body), so don’t shout to reach the phone 🙂
Key Points:
Obviously, where you put the camera is important as this will act as your audience’s eyes. You want to shoot in landscape (horizontally). Unless you have a lot of space in front of your mat, you’ll probably want to lay your mat horizontally so that you can see your whole body. You need to test the camera shot to make sure that is it capturing you fully (in other words, your hands don’t get cut off when you reach them overhead).
I’ve done plenty of shoots where I have simply propped my phone up on a bookshelf in order to record. However, I recommend you use a tripod for a few reasons:
My recommendations: get a decent tripod. It’s worth it. You want one that can lift up high enough to capture you straight on (so don’t get a tiny one that’s only for IPhones; get a real one for cameras). Here’s a suggestion (Manfrotto’s compact aluminum tripod), but you have tons of options on Amazon that you can search out. You’ll also purchase an adapter for your tripod so that it can hold your phone. I personally use this Kobra adapter. Again, while you could buy a “tripod for IPhones”, I recommend getting a legit tripod, then just getting the adapter so your phone can attach to it. You’ll get a better product.

Key Points:
Ironically, you can’t rely on your video. I want you to imagine that you are actually teaching through an audio podcast. Here’s why:
For all these reasons, you must lead your students verbally through the practice impeccably. Be very specific about rights/lefts, cueing directions, and transitions. Do not rely on the visual. It’s a great opportunity to refine your verbal cues.
Also, if you screw up – no apologies! Carry on as you would in a normal class. Cop to any mistakes if you need to, but sally forth without hesitation. Just because it’s video doesn’t mean it has to be perfect, and students love you to be human.
Key Points:
It’s going to feel weird if you’re not used to teaching with a camera. Pretend that there is a fun student right behind the lens that is loving everything that you are doing – because there is! Treat the camera as that friendly student, and look at them frequently and directly to check in (particularly at the beginning of class when your virtual audience is probably looking at you). If it helps, tack up a photo of a real student directly behind your camera so that you feel like you’re talking to someone real.
Keep in mind: though it’s mediated by the camera, you’re teaching to real students beyond the lens. Remember them, and enjoy the opportunity to share your teaching.
Rachel supports yoga teachers and studios around the world to create transformational education experiences that help them thrive in their business, share their passion, and inspire more people to practice yoga. Her extensive knowledge and experience include: earning two masters degrees, authoring three books, leading 4,000+ hours of TT, building a teacher training college for a national yoga company, and working behind the scenes in yoga studio & teacher management for more than fifteen years. As a writer and speaker, she continually wrestles with the juicy bits of life: relationships, authenticity, and discovering meaning in this crazy, wildish world. E-RYT 500, YACEP, BA, MFA, MSci. Learn more about Rachel.


8 replies on “Five Best Practices: How To Teach An Online Yoga Class”
So awesomely helpful!!! Thank you Rachel!! Giving this a try. I think I already messed up my audio! LOL.
LOL it’s easy to do 😉
Thank you Rachel. As with your online classes, there is an abundance of goodness in this post, so many golden nuggets. I think I originally posed a question on this on your Facebook group, and I’m so glad I did. I’ve already shared on my YTT alumni page, and will share more widely as with the rapid increase in online yoga teachers, there is so much to learn. Fab!
XOXOX Great question – I know, it’s like yoga…there’s always more to learn!!
As always, this is on point and timely, well-distilled and effectively communicated. You are such a yoga jedi!
LOL Thanks Emily 🙂
For the audio is it possible to use a lapel mic with transmitter and receiver – the receiver plugs into your phone headphone jack with an adapter? i.e. no other speaker?
Yes, in fact that’s what I’d recommend. No outside speaker/monitor.