You Are Not Your Bad Thoughts

“The beginning of freedom is the realization that you are not the thinker.”

– Eckhart Tolle

Many of us go through life believing that our thoughts are who we are. Thinking is so familiar to us, so much part of our moment-to-moment reality, that we can’t imagine who or what we would be without it. 

Of course, we need thinking in order to navigate our lives. Reflective thoughts enable us to learn from our experiences and hopefully make wiser choices moving forwards. Thinking about the future means we can plan the lives we wish to live. As a species, our ability to think creatively has allowed us to increase our comfort, improve our life expectancy and fashion everything from skyscrapers to silicon chips.

But what happens when we are overtaken by thoughts that seem to be working against us? What happens when the same thoughts loop round in our minds on repeat and we feel powerless to stop them? What do we do when our thoughts are telling us that we are worthless, unlovable, destined to fail, or even that the world would be a better place without us?

The Secret Self

I struggled with my own thinking patterns a lot in my 20’s. I was my own worst critic, believing I was not good enough, not smart enough, not interesting enough for the world around me. Inconsequential problems would lodge themselves in my head and refuse to leave me alone.  I did what I could to escape them but even if I found a temporary reprieve they were destined to bounce back more aggressively at some point.

At times my thoughts could be dark, random and even disturbing. Because I believed I was my thoughts, it followed that I must be a bad person.

Not wanting to let anyone in on this secret self, I attempted to contain it and fake normality. I tried to be nice on the outside and just hoped that no one would notice otherwise. Needless to say this was a lonely and imprisoning experience.

Awakening The Witness

I remember the first time I tried meditation in my 20’s. It did not feel at all helpful. In fact it felt like being in confinement with my worst thoughts. The experience only added to my feeling that there was something wrong with me. How come meditation could work for other people but only made things worse for me? What was I missing?

It wasn’t until I came across The Power of Now by Eckhart Tolle that I experienced the ability to step back from my thoughts and observe them. Here is an exercise from the book that stays in my mind:

“Try a little experiment. Close your eyes and say to yourself: “I wonder what my next thought is going to be.” Then become very alert and wait for the next thought. Be like a cat watching a mouse hole. What thought is going to come out of the mouse hole? Try it now.”

In waiting for the next thought to come, I found that a gap opened up in my mind. In this gap there were no thoughts and yet there was something alive that felt like me. It was peaceful, spacious and clear. By practicing the exercises in the book, I continued to access this thoughtless place. With time, I found I could shift into it more readily, without needing to do anything in particular.

What I had come across in The Power of Now was ‘the witness’ – the part of us that sits beyond the thoughts, is able to observe them and know it is not them. It was life-changing for me because I now knew I was something more than my thinking mind.

The Power To Choose

As I practiced more yoga, I discovered that the concept of the witness (Sakshi) is central to yoga. The witness enables us to observe not only thoughts but physical sensations and emotions too. We discover from this observing place that thoughts, sensations and emotions come and go whilst the witness is always there, unchanging. The analogy that is often used for this is a clear open sky (the witness) with clouds passing through it (thoughts and sensations).

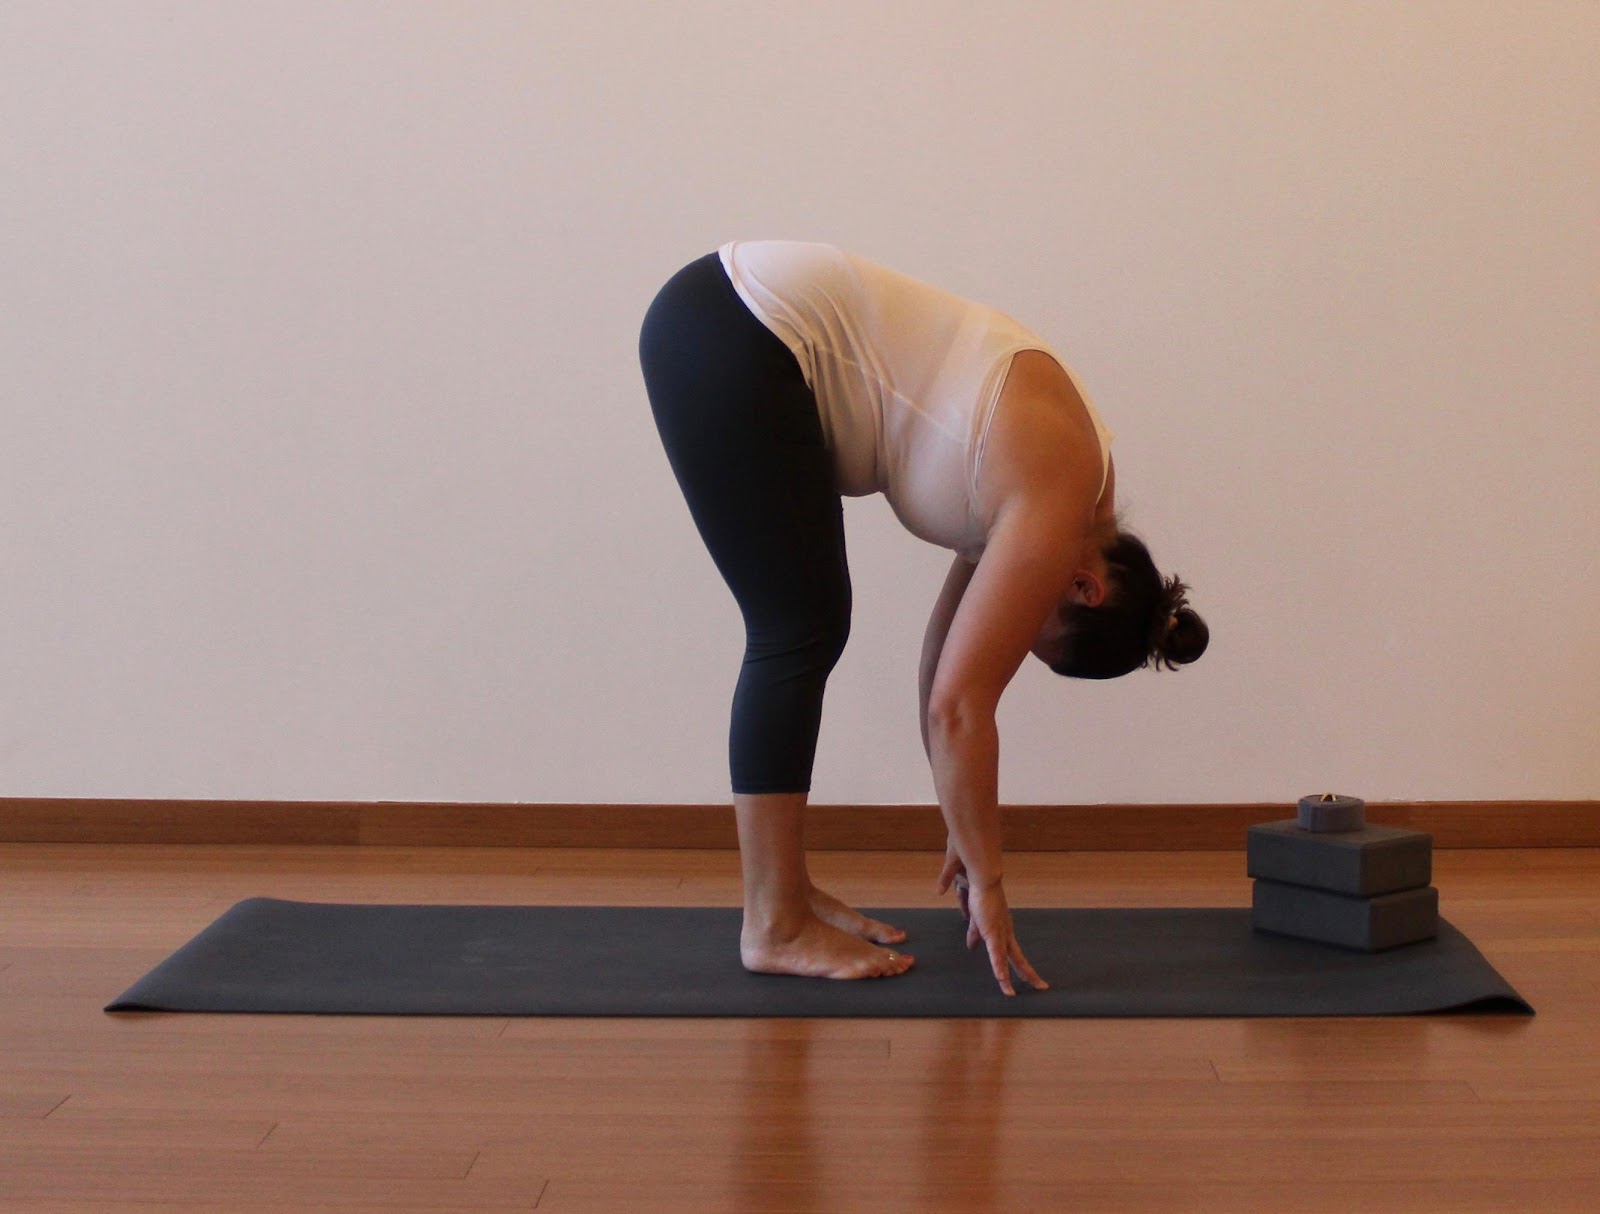
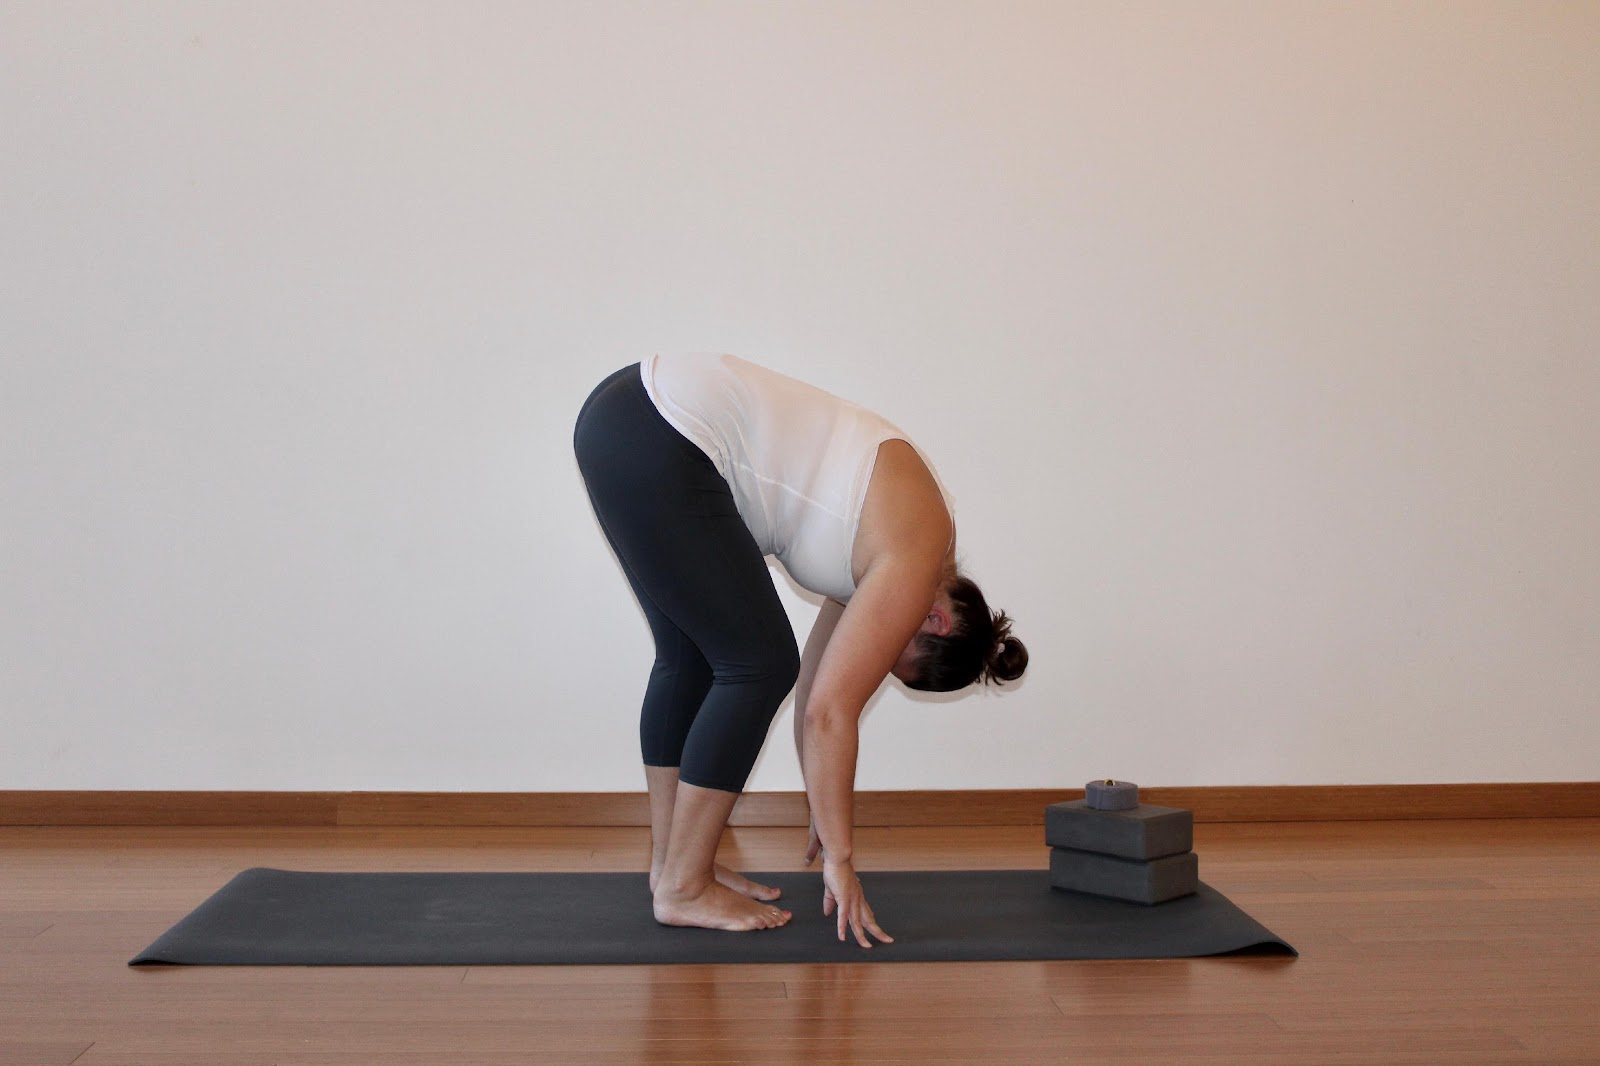
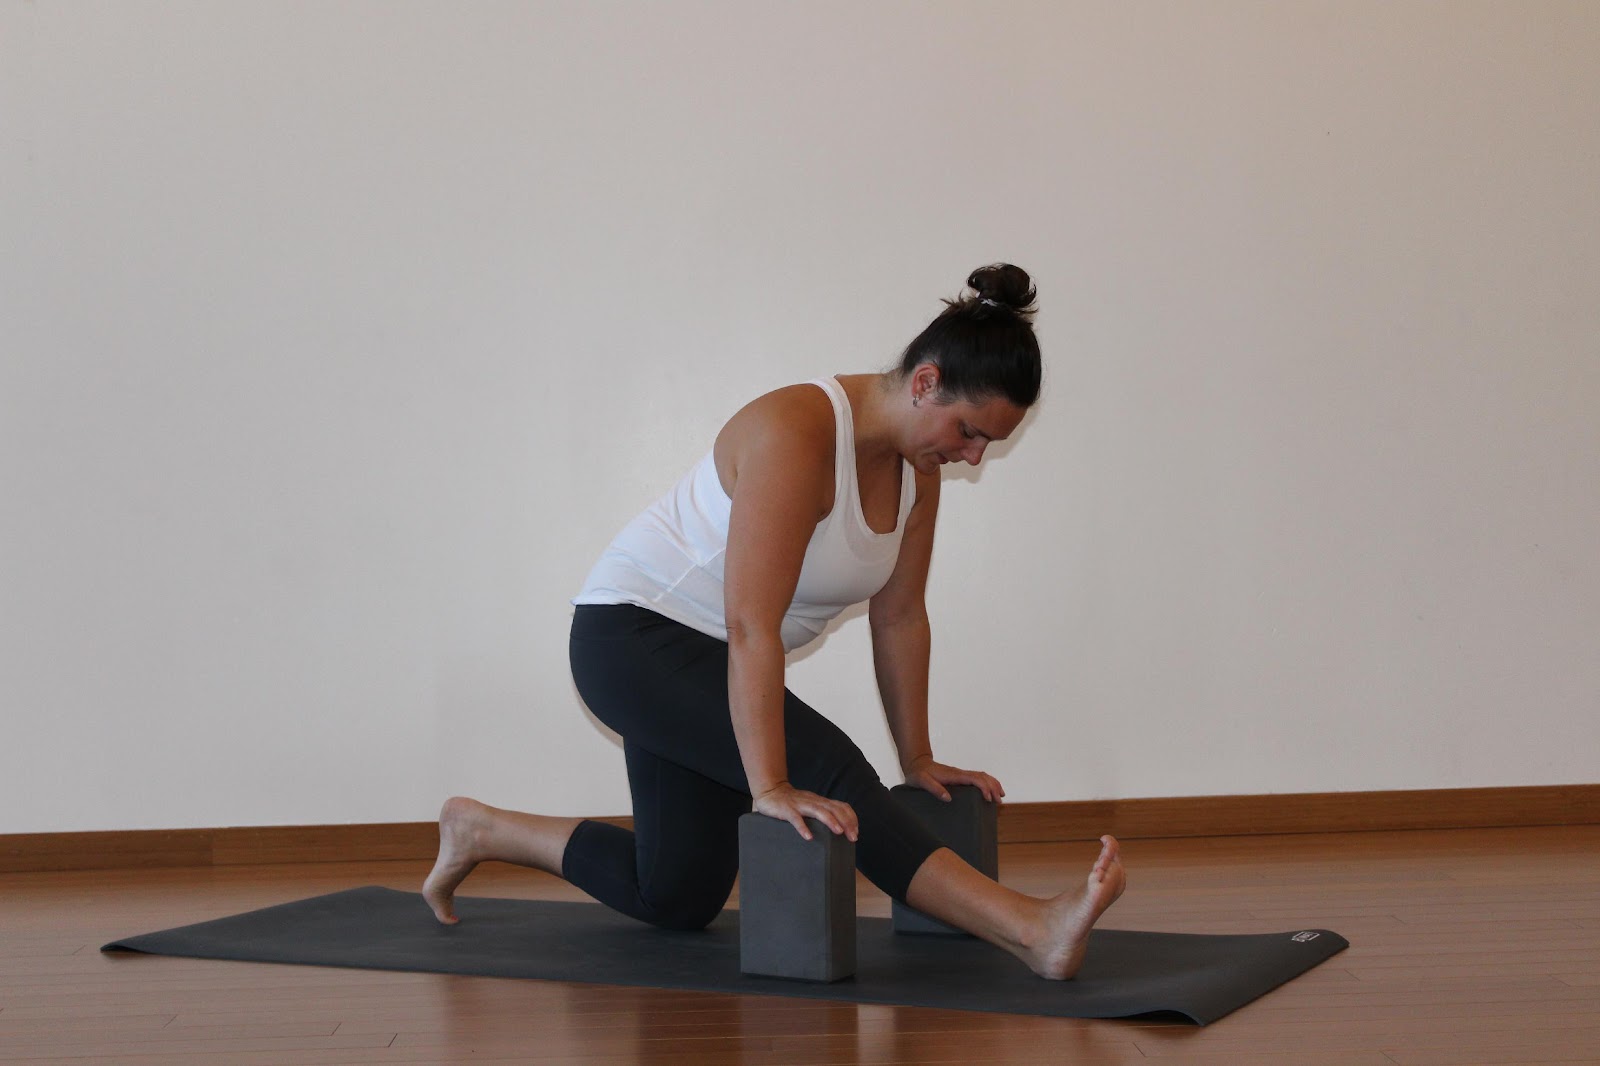
There are many ways that yoga helps us to access this witnessing capacity. Whether we are meditating or moving through our asana practice, focusing our attention on a particular object such as the breath makes it easier to notice when our mind wanders and thoughts arise. The more we get used to doing this on our mats, the more it becomes natural in our everyday lives.

Over time, we start to notice our habitual patterns of thinking and find we have a choice as to how we engage with them. We might, for example, choose to challenge self-criticism by reminding ourselves of our positive qualities. Other thoughts we might observe but allow them to just pass on by. And when we notice the kind of thoughts that support the vision we have for lives, we can choose to engage with them and act upon them.

This act of witnessing our thoughts also helps us to change our behaviour. So if I’ve decided I don’t want to drink alcohol every night, rather than just going along with the voice that says ‘it’s the end of a long day, you deserve it’, I can observe this as a thought that’s not serving my best interests. Then I have some space to weigh up my decision – do I actually want to have a drink tonight or might I make a different choice?

The witness gives us the gift of the gap; the space in which choice becomes possible.

Gateway To Freedom

The important thing about witnessing is that we are not trying to push anything away. Dark thoughts may arise and we notice them but we learn not to react to them. We discover that just as the sky can accommodate a myriad of clouds, we can make space for a whole range of thoughts.

In fact, difficult thoughts can even become a gift.

It’s easy to be complacent with a continuous stream of thoughts when they are mostly peaceful and pleasant, but when our thoughts start to trouble us, it can remind us to take a step back from them.

In stepping back, we release ourselves from the limitations of the thinking mind – the belief we are trapped, separate and alone. We find a gateway to our true nature which is expansive, peaceful and free.

In the words of the late spiritual teacher Ram Dass:

“Eventually, floating in that subjective awareness, the objects of awareness dissolve, and you will come into the spiritual Self, the Atmān, which is pure consciousness, joy, compassion, the One.”

– Ram Dass

Putting It Into Practice

Here are a few ideas for accessing the witness:

  1. Take your awareness to your breath as it moves in and out of your nostrils. Feel the sensation and temperature of each breath. When a thought pops up, notice it and return to the sensation of the breath. Notice your ability to notice the thoughts
  2. Try free-flow writing. Write three A4 sides of whatever is going through your mind, without judging, analyzing or stopping. When the thoughts are on paper, it creates a sense of separation from them and it’s easier to see that they are not us. (This technique is taken from Julia Cameron’s book The Artist’s Way. She recommends doing it first thing in the morning and it’s therefore known as Morning Pages.)
  3. Practice witnessing sensations in your body, both during your yoga practice and throughout the day. Let go of the labels (‘my achey hip’, ‘my indigestion’) and bring a sense of curiosity to the sensation. Notice the part of you that’s doing the noticing and see if you can rest in it for a time.

Did you enjoy this article? You may also like Not everyone who practices yoga is happy; and that’s okay.

Types of Meditation

Hi all! I liked this sweet little infographic from Health Perch; it’s a nice quick reference for meditation styles and tips:

“If someone says “meditation” to you, what do you think of? You might think of Buddhist monks, chanting together. Or you might recall a bunch of yoga devotees sitting together in silence and thinking deep thoughts. But meditation can benefit everyone, even if you’re not an expert and even if you just tackle some sort of meditation for a few minutes a day. And you might be more encouraged to tackle meditation if you know that there are various kinds of it and that you can probably find the type that best fits your personality and your goals.

For example, Kundalini meditation is inspired by the yoga practice of the same name. And in fact, it integrates a physical approach with breath work, with thoughtful approach to moving up the spine and connecting mind and body. Want to learn more about why meditation may be a good thing for you and what types you want to try? This graphic has some ideas.”

Link to original article.

Students: What You Need To Know About Online Yoga Teacher Trainings

Girl sitting at computre

COVID-19 has struck. Yoga Alliance has given the thumb’s up for online yoga teacher trainings through the end of 2020. And now there is an onslaught of online yoga TT’s cropping up worldwide.

Online yoga teacher trainings seem great: convenient, often well priced, and timely. But are they good? Here’s what you need to know.

About Online Education

When planned properly, here’s what online education does really well:

  • Allows students to study material at their own pace (some students may like to move slowly, some will move quickly; having material online allows the rewatching of videos).
  • Allows students to study material when it fits into their lives (at different times of day and on different days).
  • Can be very useful for learning brain stuff. In yoga, this translates to taking courses on yoga theory, sequencing, philosophy, some anatomy, and history.

Here’s what an online yoga teacher training has challenges with:

  • Teaching material where you need to touch a physical body on hand (like learning hands on assists).
  • Teaching asana labs, or looking at variety of bodies in 3-d in real time.
  • Mimicking the environment of teaching an in-person class (if you’re going to teach an in-person class, you need to practice teaching real people in real-time).
  • More challenging to create community and sense of connection between the students.

100% Online Yoga Teacher Trainings

Some schools are moving all their training hours onto Zoom and livestreaming their programs. This is a great stop gap measure and I personally can vouch the quality of two schools – YYoga and YogaWorks – that are using the method to support their teacher trainees. After all, it’s very tough out there for yoga schools right now; livestreaming a TT can be welcome solution to keep your program going and to connect with your students. Meeting in real-time in a virtual space is the next best thing to meeting in person. This is called synchronous learning, where everyone shows up in a virtual space at the same time.

However, there are some limitations with livestreaming an entire yoga teacher training that you should be aware of (which is why Yoga Alliance is permitting online learning as a stop gap rather than fully embracing it for all course hours). If you want your trainees to teach a group class in-person, then it’s better that they practice teach in-person students. Teaching on a zoom call is not the same thing. Schools that need to deliver a 100% livestream course would do well to consider some innovative solutions to address this particular missing link, such as:

  • In-person teaching at a safe social distance, perhaps with limited numbers.
  • Having students recruit other members of their household to teach so that their online teachers can watch them teach a “class with students” via livestream (get your family to sign a waiver :).
  • When students practice teach, have them mimic being in a real space. Lay out mats to represent students so that your online trainer can watch how you navigate a real room.
  • Utilize the online format to practice skills such as verbal alignment corrections in real-time.

Although the 100% livestream option is a good stop gap, it can also miss out on some advantages of online training: namely, the ability for students to work at their own pace at their own time. This is called asynchronous learning, where students work by themselves, rather than having to meet a group online at a specific time.

However, for asynchronous learning to be effective, it must be well-planned and well-crafted. They cannot be easily thrown together, but must be structured with love, skill, and care. To give you an idea, it takes at least 8 hours of work for every asynchronous course hour. That means that creating a 200-hour teacher training would take 40 weeks of working 40 hours of week, or almost a year. Yikes! That’s a long time. So if the training that you are considering is not 100% livestreaming, but is using asynchronous learning, then it’s a good idea to ask a few questions about how they created their asynchronous content.

What You Should Ask

Taking an online yoga teacher training now may be an excellent opportunity for you to deepen your love of yoga, fuel your passion, and advance your practice. And as I mentioned, there are many reputable schools (like Yoga Works and YYoga) that have moved their courses online to accommodate the times. Hybrid schools such as DoYogaWithMe blend online learning with in-person components to take advantage of both modalities. However, there are probably also some schools out there that may be jumping on the online train that aren’t fully prepared. It’s important that you can ask some questions so that you can tell the difference.

To protect your investment and the quality of your experience, here are some good questions to ask your school before you jump in:

  • How is the training delivered (how many hours of the training are online versus in-person)?
  • Of the online hours, how many are synchronous (requiring me to show up at a specific time in a livestream) versus asynchronous (where I study, watch videos, read, or move through course material on my own)?
  • What kinds of activities happen in those online hours?
  • What kinds of activities happen in asynchronous hours?
  • How are you encouraging peer to peer interaction? (This is huge for having a good experience.)
  • How are you managing/ enabling faculty to student interaction? How much contact will I personally have with faculty members? (Also huge.)
  • How will you assess me – both at the end of the training, as well as during the training – to make sure I’m learning how to teach effectively and safely?
  • How will you assess the advancement of my own personal practice?
  • If we’re 100% online, what kinds of activities will you provide to ensure that I can teach a group public class?
  • If you have online content (not livestream), where did the content come from and how was it organized (ie: recordings of previous trainings, YouTube videos, etc.)?

Any yoga teacher training worth its salt will be happy to sit down with you and discuss these details. For a more generalized look at how to think about yoga teacher training, check out my article with Yoga International, “How To Choose A Teacher Training.”

Reimagining the Yamas and Niyamas

sutra - threads

In The Yoga Sutra (sutra = “thread”), the yamas and niyamas are often translated as “external” and “internal observances,” or guidelines for conducting ourselves with others and ourselves. My first teacher suggested that the yamas and niyamas were, “yoga’s version of the Ten Commandments.”

The yamas (external observances) are:

  • non-violence
  • truthfulness
  • non-stealing
  • celibacy
  • non-grasping

The niyamas (internal observances) are:

  • willingness to endure intensity (tapas)
  • self-study/ study of spiritual books
  • surrender to the highest
  • cleanliness
  • contentment

However, a more powerful perspective is that the yamas and niyamas aren’t rules at all; they are practical and invaluable signposts that help us investigate our spiritual and emotional progress.

The Purpose of Yoga

Patanjali (compiler of the sturas) was not interested in yoga practitioners being “good.” His primary objective was to help practitioners deepen their connection to the true Self. The objective of the sutras is explicitly outlined in sutra 1.2-1.4:

  • Yoga is the restraint of the fluctuations of the mindsutff.
  • The the Seer (Witness/ Self/ Purusha/ Consciousness) resides in its own nature.
  • Otherwise it assumes all the modifications of the mindstuff.

In other words, yoga occurs when we calm our minds enough to experience our own Presence. This is the true Self. Otherwise, we are attached to the thoughts, feelings, and identifications that we have learned from our conditioning. It’s a little like our mind is a lake. When disturbed by wind (thoughts and feelings), the surface of the lack is choppy and unclear. But when the lake is calm, then the lake can reflect the sky (Pure Consciousness).

Reimagining the Yamas and Niyamas

Rather than viewing the yamas and niyamas as rules, they can be seen as valuable signposts that indicate when we have strayed from our connection to the true Self. In other words, the surface of our lake is choppy. When we don’t feel aligned with the yamas/niyamas, it’s usually because we are not seated in our Presence, but have gotten caught in our minds again.

I recently had an experience where I felt very misunderstood. I felt accused unfairly, yet I had no recourse to share my point of view or defend myself. My reaction? I was incredibly pissed off.

When I recognized my response, I realized that I was of out alignment with the first yama of non-violence. Rather than berate myself for my feelings, I got curious about what was hanging me up. I started to see that I was very attached to my reputation (how others perceived me). My reliance on something outside of myself to feel okay was exposed. The experience was a reminder to practice (practice, practice!) trusting my own worthiness.

Spiritual growth isn’t about turning the other cheek or suppressing our feelings. Instead, we can use our reactions as vital clues into our unresolved attachments and conditioning. Here are some ways that it works for me:

  • Ahimsa: When I want to lash out, I am usually invested in protecting my ego from insult or harm.
  • Satya: When I want to lie, I am often protecting my conditioned personality from dislike, disappointment, or conflict.
  • Sauca: When I want to be “unclean” and eat a lot of sugar or drink a lot of wine, I’m often avoiding uncomfortable feelings.
  • Aparigraha: When I am grasping onto something (a person, material stuff, ideas), I’m usually connecting to a feeling that I’m not enough.

Seeing the yamas and niyamas as useful signposts – rather than rules – gives us accountability for our own spiritual growth. Rather than dutifully following a behavioural prescription, we are instead invited to watch our natural reactions with curiosity. Rather than feel shame or judgement about “non-yogic reactions,” we can instead greet each reaction with fresh curiosity. In this way, our relationship with our emotions and reactions can become a vital, organic opportunity for self-acceptance, accountability, and growth.

The Power of Self-Healing in Yin Yoga

Child's pose

When I practice Yin Yoga, I become myself completely and experience a deep feeling of peace within myself— I am fully myself and do not have to please anyone else—either proverbially or in reality. While some types of yoga specify precisely how certain positions should look, and many practitioners do their best to emulate this ideal image, Yin Yoga is oriented towards the person practicing it—you can’t go wrong. Our inner teacher is the most important yoga teacher and only considers this one individual body. I believe there is great healing potential within this as only we ourselves sense what is best for us.

I do not consider it wise to seek out a doctor just to have a medicine prescribed for current complaints—and to hope that everything will be fine again—without any further questioning. Unfortunately, essential conventional medicine increasingly focuses on combating symptoms and less on looking for the cause. Also, very few doctors have enough time to concentrate intensively on the history of the individual patient. Alternative medical practitioners, on the other hand, tend to look for the origin of the complaints, and they view people more on a holistic level, taking more things into consideration which might have caused the issue in the first place.

In order to better understand our particular ailments and issues, we need rest periods, and  some kind of regular practice, for example something like a regular Yin Yoga practice, which directs the senses inwards and can bring us into deep contact with ourselves. The mind speaks very softly, and these periods of withdrawal are absolutely vital to  understand it and to find out what the body can express with symptoms. It is said that when the mind is not being listened to, the body sounds the alarm through illness, thereby making the person slow down.

Ideally our energies are in balance when we both integrate Yin and Yang energies into our life. Yin corresponds to a female, more receptive, and yang to a male, more outgoing energy. In our current age we oftentimes have a surplus of Yang in our environment, which can trouble us at a physical level. Never before have there been so many hyperactive children as there are today—I tend to find the term “hyperactive” unsuitable, and I am only using it here for the ease of understanding—and “burnout” is just named as a fashionable complaint, without due respect for its incredibly harmful effect on our lives. In my experience, I find an important cause is anxiety, which can be worsened due to an excess of intense Yang-energies.

Think for a moment how everything has changed over the years: Barely anybody takes time out to rest in the early afternoon nowadays; due to mobile accessibility we receive calls or text messages late in the evening when we should actually be resting; the TV is on all day in some households, even when nobody is consciously following it; there are fewer family meals; the performance mentality at school and at work is ever-present; attentive conversations without glancing at your mobile phone have also become rare. All these things exhaust our Yin. Yin and Yang are then no longer in balance, which has adverse consequences. If these energies fall out of their dynamic balance, energy can no longer flow harmoniously and this creates the circumstances for illnesses to occur.

Yin Yoga practice gives us the peace that we so urgently need in this noisy world. We can use it to get in touch with our inner selves once again, as well as find release in our stuck places. Our body awareness is trained and intensified through long and deep stretches, but these also provide us with calm so that memories or emotions can emerge again. If we become our own quiet observer and look and listen carefully to what it is showing us, it is quite possible that we will even be able to trace the causes of certain complaints in time.

Our body communicates with us constantly, but many of us have forgotten how to listen to it and interpret its signs. For example, if we experienced emotional damage in childhood, we often carry this into our adult lives. Symptoms often appear—such as nervousness, anxiety, depressive malaise, or sleep disturbances—which can be treated quickly with medicines, but the actual causes of the complaints remain unrecognized and untreated. It is therefore important to become aware of what is going on inside us, no matter whether it is pleasant or painful. If we identify what is causing us stress, then we can accept it, process it, and ultimately let it go. This progression can be very liberating and is a complete contrast to the repression of unpleasant experiences or memories. A repression mechanism never works in the long term. Whatever is behind it will keep occurring until it is accepted, understood, and released.

Yin Yoga practice, with its passive stretches that last for 3-5 minutes, we can learn,  in a wonderful way about the process of letting go. If we have learned to let go physically, we can then also let go better emotionally and mentally. The peaceful and introverted Yin Yoga practice gives us sufficient space to question pain or illnesses and find out what the body is trying to tell us.

We know today that our self-healing capacities are most powerful in the parasympathetic state which you can reach during a yin yoga practice. But always remember that YOUR path might be very different from that of your partner, your friends, or your family. Please be mindful with yourself, so you can experience the power of self-healing in early states if your body is out of balance and trying to tell you something. Then you have a good chance of getting back on track again soon.

Here is a yin yoga sequence which focuses on stretching all meridians and ends with a tapping massage so that you can start refreshed into the day! 

Enjoy your practice!

***

Adapted from Be Healthy with Yin Yoga: The Gentle Way to Free Your Body of Everyday Ailments and Emotional Stresses by Stefanie Arend (She Writes Press, August 2019).  

Photo credit:  Forster & Martin Fotografie, Munich

Yin Yoga For Depression

yoga student prone, with elbows crossed to open shoulders.

We all experience difficult periods in life that leave us feeling sad, lonely, or scared. However, some of us deal with these emotions almost daily. 

Depression is a psychiatric condition that usually manifests in listlessness, sadness, anxiety, and guilt. It often has internal or endogenous causes, but can also be related to conflicts, stressful circumstances, or trauma.  

We carry our healing powers within us at all times, but sometimes they are hidden by a lack of contact or familiarity with our inner self. Meditation, self-reflection and the simple act of taking time for oneself, in addition to the psychological benefits to be gained from any exercise, make yoga a powerful component of the healing journey. Yin Yoga helps us get in touch with our emotions and balance the energies that run haywire throughout the day.  

If the feelings you are experiencing are not just a temporarily more depressive mood, but are indeed symptoms of depression, then treatment from a psychotherapist or other mental health professional is recommended. Yoga teachers should never presume to see themselves in this position. However, we can give valuable support on the path to mental health and happiness.  

Depression is oftentimes kept secret due to embarrassment or anxiety. A diagnosis, or even an awareness that one feels differently from the people around them, can lead to insecurity and compound stress. Therefore, it is particularly important to feel comfortable and confident in your yoga practice rather than striving for a specific ideal in your poses. Because Yin Yoga is adaptable to specific needs and capabilities, and because there is no ‘right’ or ‘wrong’ posture, the Yin method is easily accessible to everybody. When I practice Yin Yoga, I become myself completely and experience a deep feeling of peace and freedom with the realization that I do not have to please anyone else. 

Depression is often related to suppressed emotions—for example aggression, grief, or anger. It is therefore important to work through possible trauma or face your own anxieties. Meditation can be very helpful here, but the inexperienced should practice with a teacher who can help and support them if necessary. A doctor, therapist, or teacher can support you and open the door, but remember that you must pass through it yourself. 

Possible questions for reflection are: Why am I anxious? Which of my emotions and experiences wish to be seen? What issues from my childhood still need to be healed? What is my calling, and how do I get back on my path? 

Below is a series of Yin Yoga poses to ground and comfort you in this difficult period: 

Ujjayi Breathing 

Ujjayi Breathing can create heat in the body, but it can also be very relaxing. It is therefore ideal for the start of practicing exercises, if you feel unsettled, or your mind is very full. Ujjayi translates as “victorious breathing,” as it triumphs over shallow breathing. Breathe in Ujjayi as long as you like. In some styles of Yang Yoga, Ujjayi Breathing is also practiced while doing the poses.  

Sit in Easy Pose on the mat, and straighten your spine while placing your hands loosely on your legs. Now let the epiglottis narrow, with a deep flow of breath out into the throat area, as though you were making a whispering sound with your mouth closed or were breathing onto a mirror to clean it. The sound of Ujjayi Breathing is reminiscent of a distant sound of the sea. With this sound in the throat, you can inhale and exhale calmly and deeply. Come back into a natural flow of breath and feel the effect. 

Crosslegged position, breathing.

Dragonfly (Upavistha Konasana) 

1. Sit on the mat with outstretched legs, and open your legs wide until you feel a comfortable stretch in the sides of the legs. Take a yoga bolster or a rolled-up blanket and lay it centrally lengthways in front of you so that your stomach is touching the bolster when you bend forward. If you want to massage the lower stomach organs, then lay the bolster flat on the floor. You can reach the upper stomach organs better if you place one or two blocks under the lower end of the bolster. If you are not very mobile, you can also place additional blankets or blocks on the bolster to raise it. Then relax your back and legs, and bend forward as far as your body will allow. Rest your head on your hands or props. Direct your breath gently to the stomach and pelvic area. 

2. Alternatively, you can also go into Half Dragonfly by stretching your leg out to the side and bending the other one inwards, pulling your foot to your pelvis. You can then also change the position of the leg. 

3. Another variation is Dragonfly with a side bend. Sit up straight again and tilt your upper body to the left. Place the bolster on the left leg so that your arm is supported comfortably. You can either take your right arm behind your back, or lift it at an angle over the head to increase the stretch. 

Remain in Dragonfly for three to five minutes, including Dragonfly in the supine position or Half Dragonfly, and changing sides. You can stay in the side bend for one to two minutes per side, and in the rotation for around five to eight breaths. Then come back to the center and relax into Supine Position. Alternatively, you can just do the forward bend. 

Dragonfly pose (wide legged forward fold)

Dragon (Anjaneyasana) 

Come onto all fours, and place a blanket under the knees if you are sensitive to pressure 

here. Then take your right leg from between your hands and place your left knee on the floor. If you want the position to be gentler, then pull the left knee forward slightly; for more intensity, take it further back. The right knee can be placed in front of, above, or behind the ankle, but this should not cause any pain in the knee. Let the pelvis sink towards the floor very passively. Now place the hands either left or right next to the foot, or both on the inside. The position becomes more intense if you support yourself on your forearms, and it is slightly easier if you use props—for example, blocks or a yoga bolster. 

Low lunge with outer hip stretch (dragon pose)

Embracing Wings 

Lie on your stomach and cross your outstretched arms at shoulder height under your body. Your right arm is in front of the left one, and your palms are facing upwards. Place a block or folded blanket under your forehead, or a yoga bolster under your chest if you wish. Give your weight up to the floor. If the tips of your fingers go numb in this position, then you should change it—for example, with the head up higher or moving your arms a few centimeters up or down. 

Remain in the position for two to three minutes and then change sides. Release your arms again and then relax into Supine Position. 

prone pose with shoulder stretch.

Cleansing Meditation 

Practice this meditation daily as you wish, as long as you feel completely freed by this. 

Recall something that made you feel uncomfortable: something that annoyed you, for example, or an injustice that was done to you or something that sucks your energy. Now think of an energizing place in nature, a place where you really feel good. Sense this place precisely. Imagine gentle drops of rain falling on you, which are colored violet. These drops are running over your whole body, first outside and then inside too—like an external and internal shower. The violet water flows over your hands and feet and out of you again, and takes everything with it that should no longer be part of you. If you feel externally and internally cleansed, then imagine your crown chakra opening up and radiant white light flowing into you. The rays are flowing through your whole body, and they replace everything that you have just given up with new positive energy and strength. 

*  *  * 

This article includes poses from Be Healthy with Yin Yoga: The Gentle Way to Free Your Body of Everyday Ailments and Emotional Stresses by Stefanie Arend (She Writes Press, August 2019).  

Photo credit:  Forster & Martin Fotografie, Munich  

Find Stefanie.

Find Stefanie on YouTube.

Yin Yoga Sequence For Anxiety

Yoga Teacher in a restorative backbend on a bolster.

Anxiety is the most common mental illness in the United States. There are many kinds of anxieties, ranging from social anxiety to obsessive compulsive disorder to specific phobias. Most of these are associated with a loss of confidence, and particularly with a lack of basic trust, which is marked in childhood. However, anxiety is also correlated with a complex and variable set of risk factors such as brain chemistry, genetics, life events, and personality.  

Easily recognizable physical symptoms of anxiety include quick, shallow breathing, muscle tension, high blood pressure, and feelings of narrowness or rigidity.  

Anxiety is treatable, but unfortunately the large majority of people affected never seek professional help. It is important to face your fear in order to discover its cause. Depending on the severity and depth of your anxieties, this does not have to be something you face alone—almost anyone can benefit from the support of family or friends, and for traumatized or depressed people, working with a therapist can be very helpful.  

In China there is a lovely expression which goes: “Anxiety knocked on the door, trust opened it, and nobody was there.”In the spirit of that wise proverb, some possible questions for reflection are: What exactly do I fear? What is the trigger for my anxiety? Where and how can I feel this anxiety? What happens when I face the anxiety? What happens if I feed my anxiety with trust and love? Oftentimes, though it may seem counterintuitive, the simple act of accepting our feelings of anxiety for what they are, rather than feeling stressed about being anxious, can go a long way toward alleviating mental and emotional discomfort.  

Yin Yoga teaches us a simple but powerful method for soothing the worries that have become so prevalent in our daily lives. Please join me below in a series of accessible poses and a guided meditation to help leave our anxieties behind and find physical, emotional, and mental equilibrium. 

Full Breathing 

Sit on the mat in Easy Pose and straighten your spine. Be aware of your natural flow of breath. Let it deepen with every breath. Place your hands on your abdomen, left and right of your navel, and consciously direct your breath there. Then take the hands onto the lower ribcage and breathe into your chest area. Place your hands below your collarbone and breathe into the upper apex of the lungs. As you inhale, lift the hands upwards or forwards, and lower them again as you exhale. Put one hand on the lower abdomen and one hand on the upper abdomen. Now link up the breath across all three levels. Become aware of the small pauses between breathing in and out, and extend them a bit further. Now either breathe with an extended inhalation, very evenly, or with an extended exhalation—depending on what feels harmonious to you. However, always breathe in such a way that the breath can still flow easily. Come back into the natural flow of breath and notice whether anything has changed. Alternatively, you can also do Full Breathing while lying down. Place your feet on the floor and leave your hands resting on the abdomen. This version is ideal before going to sleep, for example, or if you are lying awake and unable to sleep at night. 

Sitting cross legged with hands on ribs.

Easy Pose with arm and shoulder stretch (Sukhasana) 

This position opens up the hips and stretches the whole back as well as the arms and shoulders. 

1. Come into Easy Pose, your right arm crossed in front of the left. Bend forward in a relaxed way with a rounded back, and cross your arms so that your right arm is in front of your left arm and the palms are facing upwards. Alternatively, you can grip the opposite shoulder. 

2. Then change the arm position by placing the palms downwards on the opposite knees. Remain in Easy Pose for three to five minutes, including both arm positions. Then straighten up again, release the arms and legs, and move to and fro loosely a few times. Then change sides—crossing the left leg in front of the right one, and the left arm in from of the right—and repeat the process. 

Sitting cross legged, with elbows on opposite knees in slight forward fold.

Butterfly 

Sit on the mat, place the soles of your feet together, and pull the feet towards the pelvis. Let the knees drop gently outwards, or support the outsides of the legs with two blocks if this stretch is too intense for you. You can also sit on a blanket or a cushion. Relax the back, let your upper body sink forward passively, and place your arms where it is comfortable for you. 

Butterfly, or baddha konasana.

Rainbow Bridge (Modified Urdhva Dhanurasana) 

This position mobilizes the thoracic spine, opens the heart chamber, and stretches the shoulders and insides of the arms. 

Place a yoga bolster and a rolled-up blanket straight across the mat. Then lie down with your back on the bolster, which supports your pelvis and lumbar spine. Your shoulder blades are on the blanket, and your arms are placed alongside your head. If you would like to intensify the stretch, you can extend out your legs, or for a gentler variant, leave your feet placed on the floor.  

Stay in Rainbow Bridge for three to five minutes. Then either sit up again with activated pelvic floor muscles, or roll to one side out of the position. Relax into a supine position. 

Laying over bolster.

Protective Meditation 

You can carry out this meditation any time you need protection on an energetic level. 

Concentrate on a color that gives you strength. Now imagine a column of light appearing in front of you in this color. Take a step forward in your mind and place yourself into the light. You are completely protected in this column of light. It connects you with the energy of the earth on the one hand, and with the energy of the sky on the other hand. You can help the effect further and use the following affirmation if it feels right to you: “May only light and loving energies come through to me, and may all negative energies remain outside, starting now.” Then give thanks to the universe for this energetic protection. 

*  *  * 

This article includes poses from Be Healthy with Yin Yoga: The Gentle Way to Free Your Body of Everyday Ailments and Emotional Stresses by Stefanie Arend (She Writes Press, August 2019).  

Photo credit:  Forster & Martin Fotografie, Munich  

Find Stefanie.

Find Stefanie on YouTube.

Living in the Yang World: Why We Need Yin Yoga

Photo of child's pose

Traditional Chinese Medicine teaches us that Yin and Yang are inextricably linked; there is no Yang without Yin, and vice versa. Yang represents energy and activity, while Yin is calm and steady strength. We are only physically and mentally healthy when the dynamism of Yang and the nourishment of Yin work in harmony. If the body and mind don’t rest, our Yin becomes exhausted, often resulting in anxiety, burnout, difficulty concentrating, and a host of other symptoms.

The age we live in is saturated with Yang. We dance to a draining, dizzying tempo: we creep through traffic in the mornings, toil diligently at work, then rush to tend to our daily lives and those of our families before it’s time to hit “repeat.” When we squeeze in some precious self-care time around our careers and personal obligations, it is always with an eye on the clock. There never seems to be enough time to rest, to center ourselves and to nurture our Yin energy. 

For this reason, it is crucial to tune into the mind and body. This is where Yin Yoga comes in. Although many other yoga practices (ashtanga, power, aerial, etc.) can strengthen and stretch our muscles, Yin Yoga cultivates and sustains our basic energy. It therefore has a positive impact on overall health as well as many specific ailments, from back pain and high blood pressure to anxiety and women’s issues like infertility, menstrual cramping, and menopause.

The reality is that every body is different, and everybody is seeking something unique in their yoga practice. Yin Yoga is adapted to the individual; our inner teacher is most important, and I believe there is great healing potential when we listen to our bodies and trust ourselves as we practice, allowing the pose to develop as our bodies direct. 

The Yin practice is intensive but also very passive. Our breathing remains effortless and our muscles relaxed as we hold each position for several minutes. These deep stretches make our tissue supple and have a positive effect on the fascia and deep layers of the body. Aside from reducing pain and encouraging mobility, Yin Yoga harmonizes the flow of energy, directs us to look inwards, and can activate our capacity for self-healing. Eventually, energetic connections become perceptible, and practitioners become aware of the links between our thoughts, our emotions, and our Chi. 

In my book Be Healthy with Yin Yoga, I include a section that offers insights into both common and unusual symptoms. I explore much more than yoga poses because, as a holistic practitioner, I believe it is important to understand the deeper roots of our ailments and take a comprehensive approach to healing them. Along with breathing suggestions and questions for reflection to better understand what is going on inside, I include information on Traditional Chinese Medicine (TCM) and recommend a series of poses to alleviate symptoms and strengthen our bodies. 

I do not feel comfortable claiming that individual poses can cure a certain illness. However, I am convinced that we have extremely good opportunities for healing with regard to many symptoms if different therapeutic approaches are used to complement one another. If Western conventional medicine and alternative healing techniques—such as TCM or Ayurvedic medicine—are used together, this gives individuals more personal responsibility; a great deal can be achieved overall. 

When I practice Yin Yoga, I become myself completely and experience a deep feeling of peace. In Yin Yoga I am fully myself and do not have to please anyone else—either proverbially or in reality. I hope you will discover this joy as well. Today and every day, take some time to step away from the whirlwind of our Yang world. Yin Yoga puts us back in touch with our mental, emotional, and physical selves, nourishing our energies and bringing us peace of mind and spirit.

This meditation is one of my favorites. I often use it before going to bed to bring my energies into harmony. I hope you enjoy the practice!

Five things for a man to consider when starting yoga


With over 10 years experience as a yoga practitioner, I have learned that being a male yogi can be a completely different experience from being a female yogi. Knowing what to expect can make all the difference in taking the bold step to attend your first class, but more importantly, in committing to a regular yoga practice.

Here are five things for a man to consider when starting to practice yoga.

Embrace being the odd one out

Although it is becoming increasingly popular for men to practice yoga (at least in the western world), yoga is predominantly a female environment. From the way that classes are marketed to the vivid Lycra yoga pants, it can feel as though we are entering an exclusive club. This can be an uncomfortable experience – and that’s even before setting foot on a mat!

It’s easy to feel like the odd one out when you are surrounded by a room full of super supple women, breathing in sync while we are breathlessly struggling to touch our toes. With experience, I have learned to be proud of my individuality. Let go of focusing on those external factors (such as being the only man in a yoga class or being less flexible than other practitioners!), and instead focus on the benefits of being present on the mat and prioritizing your health and wellbeing.

Do not be afraid to be your true self

As men, we have a tendency to learn from an early age that revealing our vulnerabilities is a weakness if we are to succeed in a (downward) dog-eat-dog world where often only the strongest survive. The way we act can give an impression of a hard shell that does not necessarily reflect our true self beneath. Learning to let go of this image when we arrive on the mat can be such a powerful tool in transforming our lives. Being present in the class provides us with a platform to be truly who we are – and not who society perceives us to be. Embracing this opportunity to be authentic can be a liberating experience. A yoga practice provides the means for us to delve deep within ourselves, become consciously self-aware, and proud of who we truly are.

Play with your edge – and use props

When we consider male role models (particularly sportsmen), it’s often those who succeed at competitive sports that are most widely recognized. We learn that being competitive is the pathway to success. But this can be to our detriment. Pushing ourselves beyond our own limitations can put us at risk of injury – and this applies to a yoga practice, too. We can end up trying to do yoga poses that we believe we ought to be able to do, when our body is telling us differently.

Using a yoga practice to ‘tune-in’ with our own body and mind enables us to play with our ‘edge’. Framing our yoga practice to take account of our aches, tensions, medical conditions or injuries means that we are more likely to practice safely. A yoga studio will typically have yoga props such as blocks, straps and eye pillows for use. Do not be afraid to ask how to use them to deepen into and support your practice.

Find a class that works for you

You may have any number of reasons for practicing yoga. The multi-faceted benefits of a yoga practice mean that it can touch upon and complement many aspects of your everyday life. Perhaps as a father, it is important for you to have some personal reflection and meditation time when so much of your energy must be focused on your children. If you work in a super stressful job, a more restorative yoga practice may work best for bringing calm and clarity to your life. Or, if you are a keen sportsmen, your yoga practice may be about improving your flexibility and developing balanced strength to prevent injuries. There are many different styles of yoga and the options can be bewildering. Go ahead and try different classes and teachers to find a class that works for you.

Commit to a regular yoga practice and reap the rewards

Incorporating any new activity into a daily routine can be a struggle (which explains why most New Years’ resolutions fail by February).

A yoga practice can be a transformative and life changing experience, and that transformation can often be felt after only a few classes. Committing to a regular practice may mean adapting a routine so that yoga can be part of everyday life. So, think about when the best time is for you to practice yoga, and slowly incorporate that practice into your daily routine.

It’s easy for us to be hard on ourselves when we miss a class, and we can discourage ourselves from returning. Being a father of twins and in a high pressure job for the UK government, I’m well aware how everyday life can get in the way of a regular yoga routine. I know that as a teacher, I am just as happy seeing students attend regularly as seeing those that have missed a few weeks before returning to the mat. Their return demonstrates how much yoga matters to them.

Investing in a yoga mat can also be a great way of deepening your commitment to your practice, as it means that you can practice yoga anytime at home. With so many competing pressures for our time, it’s so important to still find those pockets of “me time.” Even if your practice is only taking a few slower, deeper breaths, this can make the world of difference. I have found online resources such as Do Yoga With Me to be particularly beneficial for my regular yoga fix at home when I’ve not able to get to a studio. Take advantage of all that’s on offer and reap the rewards.

15 Minute Yoga Sequence for Desk Fatigue

yoga-sequence-desk-fatigue

Do you ever leave the office feeling utterly exhausted? After sitting for 8+ hours and staring at your computer screen, you know that you should get some movement and head to the gym or catch a yoga class. But instead you instead find yourself at home – and completely spent.

According to Healthyway, some of the ways ways in which your office job can leave you feeling tired include lack of light, lack of fresh air, and lack of movement. Take this a step further, and think about the effect that a desk job has on your overall posture. Many office jobs will encourage sore wrists, tight forearms, neck strain, shoulder issues, and aching hips. We need to offset these habitual strains with movements that help to counteract these effects. (Sorry gym buffs, it’s not more squats for your already over-taxed hips!)

While adding a structured, lengthy, or intense workout after a long workday might not feel attainable (let alone possible with scheduling demands), carving out just 15 minutes for this yoga sequence that will help combat your desk fatigue from your work day.

It’s important to make time to help re-energize and refresh your body and mind after a long day at the office. This 15-minute yoga sequence for desk fatigue will help stretch your hips, open up your front body, bring length to your spine, and give you the opportunity to slow your thinking brain down. Pro tip: like any new routine, set yourself up for success; set a reminder or an alarm and leave your mat out where you can see it to help you make it happen.

Heart Opener On Blocks

Heart Opener On Block
  • Take two yoga blocks, place one in the middle of your mat, so that your spine can rest along the block. Place the other block on it’s tallest height and rest the back of your head on it. You can keep your knees bent or take your legs long (as long as your low back doesn’t feel strained).
  • Let your arms stretch out and relax your fingers. It can take a few breaths to get settled into this posture.
  • Stay here for 10 breaths.
  • When you are done, slowly roll off the blocks onto one side and take a few breaths.

Cat/Cow

  • Move to your hands and knees, and come to a table-top position. Stack your hips over your knees and your shoulders over your wrists.
  • Move through 3 rounds of cow / cat. Notice the movement through your spine, as well as how it feels to open through your chest and stretch through your back body.

Easy Seat With Forward Fold

  • Come to a seat with your legs crossed. Sit up tall, and then fold over your legs. Walk your arms out in front of you while you send your sitting bones and hips towards the space behind you.
  • When your left shin is in front, walk your hands over to the right to stretch through your left side body. When your right shin is in front, walk your hands over to the left to stretch through your right side body.

Repeat the seated froward fold and side stretch on the other side.

  • Come back to centre, sit up tall and shrug your shoulders up to your ears. Roll your shoulders back and down. Repeat 5 times.

Neck Stretch

  • Bring your chin to your chest to find a gentle stretch through the back of your neck.
  • Nod your head over to the left to find a stretch through the right side of your neck.
  • Come through centre and then nod your head over to the right to find a stretch through the left side of your neck.
  • Do this 3 times on each side.
  • Come back to centre and lift your head so you are looking straight ahead.

Downward Facing Dog

  • Move to your hands and knees and come into Downward Facing Dog. Feel free to “walk your dog”, move through your hips, whatever movements feel good. Stay here for 5 full breaths.

Forward Fold

  • Walk your feet to your hands and come into a forward fold. Take your feet slightly wider than hip distance as you take your hands to opposite elbows. You can stay still or give a gentle sway from side to side.
  • Bring your feet to inner hip-distance and release your hands towards the earth. With slightly bent knees, press through your feet, take your arms out wide, and rise to stand. Bring your hands together and through heart centre.

Tree Pose

Tree pose
  • With your hands on your hips, externally rotate your right thigh and place your right foot anywhere on your inner left leg. Press your right foot against your left leg (as long as it is above or below your knee), and lengthen your tailbone towards the ground. Keep your hips level, and you can use your hands to help you balance or challenge your balance and bring your hands to heart centre or reach your arms towards the sky.
  • Hold here for 5 breaths.
  • Move your right knee to centre, bend your left knee, and lower your hands to the earth as you step your right foot back.

Low Lunge With Your Hands Clasped

Low lunge
  • Lower your right knee to the ground, and place your hands on your hips. Level out through your pelvis again, from left to right, as well as front to back. Find a stretch through the front of your right hip and / or thigh.
  • Root your tailbone towards the floor and then reach your arms behind you and interlace your fingers. This will help open up through your chest.
  • Hold here for 5 breaths.
  • Place your hands on either side of your left foot and step your right foot forward. Slide your hands up your shins to lift half-way, and then forward fold.
  • With slightly bent knees, press through your feet, take your arms out wide, and rise to stand. Bring your hands together and through heart centre.

Repeat tree and low lunge on the other side.

Plank

  • From Mountain Pose (Tadasana), reach your arms up, and fold over your legs. Lift half-way, and as your hands plant on the ground, step each leg back until you are in plank pose.
  • Hold for 5 breaths.

Lower onto your belly.

Locust (Salabasana)

Locust pose
  • Interlace your hands behind your back and press the tops of your feet into the earth. With your leg muscles engaged (you’ll know as your knee caps will lift slightly), lengthen your spine and reach your heart forward.
  • Lift your chest and forehead away from the ground as you squeeze your shoulder blades together.
  • You can stay here and breathe or lift your legs away from the ground.
  • Your arms can stay where they are or you can lift them away from your back body (be sure to pay attention to how this feels in your shoulders).
  • Hold for 5 breaths, and then lower onto your belly.

Make your way onto your back with your feet on the floor, and underneath your knees.

Figure 4 / Eye of the Needle

  • Lift your right leg and take your right ankle to your left thigh (closer to your knee than your hip).
  • Flex your right ankle.
  • If you need more of a stretch for your right hip / glutes, lift your left foot so your left shin is parallel to the ground.
  • Flex your left ankle.
  • Be sure your chest is open and your shoulder blades are on the ground. Your workday has brought enough rounding through your front body, so keep space across your chest.
  • Hold for 5 breaths and lower both feet to the ground.

Repeat on the left side.

Bridge

Bridge pose
  • With your feet inner hip-distance apart and your feet under your knees, inhale to lift your hips away from the ground.
  • Draw your shoulders away from your ears, interlace your fingers underneath your body, and draw your shoulder blades closer together.
  • Press down through your feet and see if you can lift your hips higher.
  • Feel the back of your head gently press into the floor so that your chest lifts up towards the sky.
  • Hold here for 5 breaths.
  • Release your hands, move your arms out from under you, and slowly lower your hips onto the earth.

Savasana

  • Let your entire body rest on the ground. Take your legs out wide, let your palms turn up to the sky. Let your eyes soften or completely close.
  • Stay here for at least 3 minutes (if you are on a schedule, set an alarm to be sure you don’t stay here longer than you can).

Slowly bring movement into your body, stretch long through your body, roll to one side. Sit up tall, bring your hands to heart centre, and notice how your body feels.


Photo credit: @violetanneyoga

How To Practice Headstand Safely

Headstand is a wonderful pose, but has suffered a rash of bad press ever since the post on “How Yoga Can Wreck Your Body“. However, when done intelligently, it provides the practitioner with an opportunity to remain in an inversion for an extended period of time. Unlike handstand and forearm stand, a skilled practitioner could safely remain in headstand for several minutes.

Benefits and Risks

According to Iyengar, headstand (sirsasana) is the “King of all Asana,” which “develops the body, disciplines the mind, and widens the horizon of the spirit” (Light on Yoga, 1976). While western medicine may not be on board with the widening of the horizons of the spirit, there are several benefits to inverting.

Inverting your body can have several happy effects:

  • lymphatic drainage from the feet
  • blood returns to the heart
  • lowering of blood pressure (by stimulating the baroreceptors in the neck, the body will lower your blood pressure to compensate)
  • cultivate upper body strength
  • when done properly, cultivates lower body strength
  • change in perspective
  • can be energetically grounding.

For the healthy practitioner, headstand can be a wonderful asana. However, you may wish to avoid inversions if you have:

  • high blood pressure (while your body is very good at regulating the blood pressure in your brain, you may want to be cautious)
  • history of stroke
  • glaucoma, or recent eye surgery
  • cervical spine injury/whiplash
  • hiatal hernia (leaky valve between stomach and esophagus)
  • a bun in the oven (while it’s not intrinsically “bad” to invert, prenatal students can have a much higher blood volume and less stable joints, which can make inversions less than ideal)

Here are five tips to set you up for headstand safely.

1. Don’t use your head

Although it’s called headstand, it’s better to think of the pose as forearm stand. Casually putting a heap of weight on top of your head isn’t a great idea. The cervical spine isn’t meant to be weight bearing (that’s what our feet are for!). When you are starting out, it is better to put your weight in the shoulder girdle through the forearms than weight the top of your head. Keep the weight on the head light. Yes, eventually you may put more weight on the head, but why not use the nice strong muscles of your shoulders, back and chest while you’re starting out? In other words, don’t use your neck! If you have a particularly long neck (making it hard to de-weight your head), then use props to “make” your arms longer. And until you develop the strength to lift your head off the floor, don’t be in any rush to use your head as a key pillar. Practicing dolphin (head off the floor) is an excellent way to build up strength (and hey, it’s an inversion too) and prepare for the full pose.

Headstand, sirsasana

2. Keep the curve of your neck natural

When you place your head on the floor, put the top of the head on the floor (not the forehead or back of the head). Imagine you are right side up and carrying a stack of books on your head. Where would they need to be positioned on your skull to balance? The intervertebral disks of the spine are happiest and best aligned when the cervical spine has a slight lumbar (inward) curve. Since we want to keep the neck happy, keeping this natural curve when adding weight is the way to go.

3. Work the upper back

Since you are bearing weight through the shoulder girdle, the position of the scapula (shoulder blades) on the back is very important. Lift the shoulders up away from the ears and draw the shoulder blades slightly towards each other to widen the collarbones and draw the upper back in. I usually prepare for headstand by training my upper back to move inwardly through backbends such as baby cobra, locust and baby cobra.

4. Go Slow

Headstand is like the grandpa of inversions: slow and dignified. Unlike handstand, it’s not appropriate to kick up exuberantly into headstand. It is a lesson in patience! Instead, go step by step (here’s a video) through the pose and cultivate your abilities over time.

5. My Favorite Cues

  • “Press down through your forearms.” This is my favorite cue (you’ll see I use iterations of this same cue all the time in this pose). This cue will help anchor the foundation, lift the shoulders and de-weight the head and neck.
  • “Lift your upper back in and up.”
  • “Root through your forearms to lift your hips.”
  • “Root through your forearms to lift your shoulders up.”
  • Once up: “Press through your forearms to lift through the legs.”
  • “Squeeze your legs and reach up through the insides of your feet.”
  • “Hug the outer hips in.”
  • Usually, students need help with avoiding a banana shaped torso: “Draw your front ribs in and lengthen your buttocks to your heels.”

Happy Practicing!

Five Yoga Poses To Stretch Your IT Band

You know the IT band: the swath of connective tissue that runs from your outer hip down to your lower leg. That IT Band.

Anatomically speaking, the IT band isn’t really a “band” at all. Although most anatomical pictures (like this one) depict it as a segment, it’s actually part of a greater fascial stocking that wraps around the entire thigh. The IT band is intrinsically connected to your pelvis, your femur, and your lower leg. Ultimately, it’s part of the great webbing of connective tissue that weaves throughout your entire body. This means that tightness in your outer leg may not be just about your poor IT band, but about constriction in the fascial network further up or down the chain (like your lower back, calves or feet).

The “IT band”

Composed of connective tissue, the IT band is supposed to be tight in order to stabilize your pelvis. That said, it can get too tight, constricted, or adhered, and cause problems like outer knee pain. As I’ve gotten older, my IT bands have become increasingly gnarly; stretching them (or the muscles that attach to them) has been helpful in maintaining a happy pelvis. If you regularly engage in uni-planar activities such as running, cycling or hiking, your outer hips will almost benefit from some attention.

Here are five poses to help you out.

1. Supta Hasta Padangustasana C

This pose is a doozy. Grab a strap or towel.

Keep your right hip DOWN as you cross your foot towards the left side of your mat.
  • Lie on your back.
  • Draw your right knee into your chest and put your strap or towel around the ball of your foot.
  • Extend your foot to the sky.
  • Straighten your leg and engage your quads (we want the quad engaged to plump up against the IT band)
  • Straighten your left leg along the floor; scrub the heel forward and press your thigh done. Work, super model.
  • Now, hold your strap in your left hand and tuck your right thumb into your right hip crease (top of your thigh). That hip is going to want to hike up. Pull it towards the end of your mat (your left heel) and anchor the hip down into the mat.
  • Keeping your right hip on the ground, cross your right foot towards your left shoulder – you do not need to go far.
  • Stretch the diagonal line from your right hip through your right big toes. Straighten your legs actively.
  • This should make your eyes water.
  • Hold for 2 minutes. YES! 2 minutes.
  • Change sides and repeat.

2. Ardha Hanumanasana (half splits…with twist)

Come into ardha hanumanasana with your right foot forward.

Now, walk your right foot to the left side of your mat, across your body.

  • Press the inner foot forward as you actively pull your outer right hip back.
  • Firm your quads (they must work here)
  • Press your heel down and pull back through the outer right hip, almost as if you could pull your right sitting bone towards your left thigh.
  • For more excitement, keep your left hands down, and use your right thumb to pull your outer right hip back and in.
  • Stretch your leg.
  • Hold for 2 minutes, yes, 2 minutes.

3. Revolved Triangle Pose

Lather, rinse, repeat. This is the standing pose version of the last two poses.

I recommend using two blocks.

Keep pulling the front hip back and in.

Press down through the big toe mound of your front foot as you draw your outer hip back and in. Again, we are capitalizing on the diagonal stretch through the tissue of the leg. Use blocks as you need to lift your chest, and do your very best to straighten and engage your legs.

As you add the twist, keep your spine aligned with the midline of your mat.

Hold 90 seconds per side. Whew!

4. Thread the Needle

This pose stretches the muscles that attach to the IT band. Getting them some slack can take the pressure off.

Thread the needle stretches the outer glutes.

Cross your right ankle over your left knee and draw your left knee into your chest. Stay here for at least 90 seconds per side.

5. Gomukhasana

Similar to thread the needle, gomukhasana stretches the outer hip. However, because the thigh is crossed more medially, the stretch will feel different. I actually find that sitting upright in this pose (without forward folding) stretches my Tensor Fascia Latae, which is an internal rotator on the front of the hip that also connects to the IT band. If your knees don’t like gomukhasana, then repeat thread the needle, but cross your right knee more towards the midline to change the directionality of the stretch.

Gomukhasana. Forward fold from here to stretch the outer hips.

The proof is really in how you feel afterwards.

Take a stroll around. For the next day, how do your hips feel? Does the stretching help? If you feel as if your outer hips/knees are still constricted, it’s a great idea to go visit a physiotherapist or registered massage therapist and let them give you feedback. A physio may discover that your constriction is triggered from a different part of your body and can help you adjust to create more slack in the fascial chain; an RMT can help to release adhesions or constrictions that aren’t accessible by stretching alone. Or (and this may surprise you), you may actually need to tighten up your outer hips more rather than stretch them! Weak outer hips can be as cranky as tight outer hips. For any persistent pain or issues, go see a specialist and get some personal loving care.

How To Practice and Teach Stepping Forward From Downward Facing Dog

When To Use

We often incorporate this transition casually into our sequences, but it is not easy! It’s harder to step forward from downward facing dog than it is to step back into a lunge from the front of your mat. The stepping forward action is really only appropriate for:

  • vinyasa classes
  • flow classes
  • power classes

So if you’re teaching a hatha or more gentle class, there’s no need to use this transition. It puts a lot of weight on the wrists, requires core strength and hip flexibility, and can feel needlessly discouraging.

Benefits of the Transition

However, if you are working in a flow/power style, this transition gives you lots of flexibility to create fun transitions from downward facing dog into your standing poses.

This transition is also an excellent preparation/education for arm balances (such as tittibhasana) and inversions because it

  • trains the hands/wrists to grip the floor
  • cultivates the student’s connection to the strength and lift of the back leg
  • trains the core and pelvis to lift UP, and
  • trains scapular protraction moving apart, which helps create upper core lift and shoulder stability.

Why It’s Hard

This transition will be difficult for you if you have short arms and long legs. Sorry, my friendly T-Rex’s, but your bodily proportions will make a difference. This transition will also be challenging if you have limited hip flexion (ability to draw your knee into your belly. Limitations in hip flexion may be caused by compression at the front of the hip, either due to the shape of the joint, or simply having more material (belly, thighs) to work around.

So there are some very good reasons why you may struggle with this transition while your bendy friend next to you makes it look like a breeze. It’s not equally easy for everyone.

That said, there are a few ways that will help to maximize your own personal capacity to work this transition gracefully.

In a nutshell, stepping your foot forward with fairy-like lightness requires that you create enough space between your chest and the floor to clear your foot.

Here are five tips to get you closer.

1. Use your back leg to lift your pelvis

It’s easy to forget about the back leg. After all, it’s way back there. Out of sight, out of mind. However, you need the back leg to work in order to get the necessary lift in the pelvis. Lift your back heel way up, roll onto your big toe, and lift your back thigh as high as possible. These actions will help you to get the pelvis high enough to clear space under your body.

2. Use your arms to lift your chest

To create space between your chest and the floor, you must spread your shoulderblades apart. Think cat pose. Widen and lift the upper back as much as possible. If you try to step forward without lifting your sternum up into your back towards the sky, you simply won’t have the lift through your chest to bring a foot forward.

3. Adapt for your hips

Not all hips are the same. Try this. Lay on your back and draw your knee into your chest. How far can it come in? Try taking your knee wider to the side. Can you get it further into your chest/ribs then?

Find your personal sweet spot for bringing the knee into your chest. This may mean that when you step forward, you will take your knee a little wider to the side in order to get more height through the thigh.

Also, take a note: if you relax the front of your hip, can you draw the knee in further? Sometimes the engagement of the hip flexors can actually impede the ability to get the thigh close to the body. If this is true for you, then when you step forward, see if you can downtrain the hip flexors a little bit, keep them more relaxed, and scoop up more from the abdominals. It’s not the easiest thing to do (because you need the flexors to turn on a bit to make this move), but worth playing with.

4. Yep. Core.

The core is important here insofar as it helps to lift your pelvis and your chest up. Also, the hip flexors (which some say are part of the core) will be working to draw the thigh up to your chest. So yes, some abdominal work is required. But they are part of the larger picture of making a “cat back” and getting your hips as high as possible.

5. Hands and Triceps

Use your hands rooting down to help you get more lift up through the chest. Press through your palms and straighten your arms. Remember, you need every precious millimeter of space between your chest and the floor for this transition, so don’t lose any of it by bending your elbows. Engage your triceps to fully extend your elbows and find maximal length through your arms. To feel what it’s like to have truly long arms, try your transitions with blocks under your hands for a few practices. Then see if you can incorporate that feeling into the transition moving forward.

Here’s a video with some visual explanations.

This transition may never be easy, but it can become more easeful over time. Happy playing! And remember, do this transition slowly for best results; momentum doesn’t count 😉

Improve Your Yoga Practice By Doing Less

I know you. I see you, my yogi friend. You want to be a better person, you want to do good. And maybe – like many of us – you think that doing better means that you have to work harder.

But here’s the irony: at some point, you have to work less to move ahead.

Let me share a story. I’ve been seeing a speech pathologist to clear up some bad vocal habits (teaching public yoga classes and teacher trainings for fifteen years can wear on the voice after a time). At my last appointment, she looked me (as readied myself to “be a good student”), and said, “What do you think about EASE?”

I immediately flinched. Ease? No, please say something else. Tell me what to do, tell me what action to take, but please don’t tell me that I have to “let go,” or “release” or some hippy nonsense like that.

But of course, that’s exactly what was needed.

Why We Get Tense

Over time, we all get knocked around a bit by life. We fall in love, and get hurt. We fail, and we armour up to hide our vulnerability. We laugh to hide our feelings, we smile to hide our fear. We develop compensatory patterns to deal with any variety of challenges: emotional, physical, and mental. We call these habits of tension our “personality.” Yogis may refer to them as samskaras, or deep, habitual patterns of conditioning. In your yoga practice, you may be all sthira (effort) and no sukha (ease).

We all have these tension patterns. And once you’ve been walking around on the planet for thirty years, these patterns of tension may start to have unforeseen side effects. You may start to develop back pain. Or maybe you become emotionally withholding. Maybe you’re in a relationship rut and don’t know how to break the cycle. Or maybe you have vocal issues.

Unfortunately, we can’t overcome these engrained habits through direct effort. That’s like adding a layer of “effort cement” on top of a faulty scaffold. The only way to find a pathway to greater functionality is to ease up and untangle the essential patterns of tension that have gotten you there in the first place.

This process can be enormously disconcerting.

When you come from a culture that encourages “working harder to get ahead,” letting go feels all wrong. In fact, letting go is actually harder than doing more (take that, workaholic brain!) because it takes incredible vigilance and care to inhibit your conditional patterning from arising.

While my vocal situation illuminates the particular challenges of unwiring a physical dysfunction, unwiring emotional and mental triggers provide a similar challenge. (In fact, they’re all the same thing.) Like my vocal habits, the emotional patterns that have served you well in the past may now be getting in the way of how you want to move forward.

However, letting go of these habits derails the familiar pillars of support and “self-ness” that have guided you thus far in your life. Inhibiting a defensive smile of politeness may feel as vulnerable as taking off all your clothes. Because, in a way, you are. You are taking off the layer of tension that you somehow associate with self-protection and “you-ness”.

Letting go of my throat tension isn’t just about releasing some physical muscles. Letting go unravels a sense of “Rachel-ness” to which I have become identified; it unhinges a sense of my own perceived I-ness. However, when I do inhibit that tension, I am in a greater space of possibility and presence.

Being present gives us the opportunity to “de-scaffold” ourselves from the layers of habitual reaction that will otherwise guide our actions and responses. When we become present, we can practice (practice! practice!) relaxing and opening to what is really going on. How do I really feel right now? If we can gently inhibit our conditioned responses of tension and reaction, then we are suddenly awake to a world of complete possibility. And while this is a little being thrown out of a window without a parachute, it’s also the only place where you really get to see the sky.

Your challenge?

More ease. In your yoga practice, but also in your life. Be willing to relax in the moment without immediately grabbing for the conditioned responses that may feel safe. Explore the no man’s land, and see what arises.

15 minutes to stretch your hamstrings

Got tight hamstrings and 15 minutes?

Your hamstrings are a group of muscles that run along the back of your upper leg. They’re used for walking, running, flexing the knee, and adduction (bringing the leg towards the midline of the body) of the leg. If you are doing activities that are taxing your quads, you’ll want to be sure to pay some attention to your hamstrings and give them a stretch, as they are the antagonist muscles to your quadriceps. (Stretching them can also be good for your back!) If you’re curious to know more details on each muscle of the group, check out this post from Very Well Fit. If you’re ready to stretch this group of muscles, grab a mat, yoga strap, and two yoga blocks, and we’ll get started!

Start by laying down on your mat. Stretch your legs long in front of you and let you body relax. Close your eyes and take a few deep breaths. Start to notice how your body feels. Do you feel a difference from the back of one leg to the other? Just take notice on what you find. You’ll come back to this later.

  • Start to wiggle through your fingers and toes.
  • Blink your eyes open and bend your knees.

Supta Padangustasana A (Modified Reclined Hand-to-Big-Toe Pose)

  • Take your yoga strap, and place it around the ball of your right foot.
  • Press your heel towards the sky and walk your hands towards the ends of the strap. Gently pull the strap towards you, bringing your thigh closer to your chest, until you feel a stretch through your hamstrings.
  • Keep your left foot on the floor or extend your left leg long on the mat.
  • Hold for 5-8 breaths.
  • Bend your right knee, remove the strap, and stretch both legs out in front of you. Notice if you feel a difference from one to the other.
    Bend your knees, and repeat this on the left leg.

Roll to one side for a few breaths and then press up to a seat.

Virasana (Hero Pose)

  • Sit on your heels. Let your palms rest face-up on your thighs.
  • Breathe here for 5-8 breaths.

Place your hands by your knees, tuck your toes underneath, and lift your hips as you straighten your legs. You’ll be in a forward fold, Uttanasana.

Hold here – noting how things feel through the backs of your legs – for 5-8 breaths.

  • Bend your right knee, as your left leg straightens. You can hold here for as long as it feels like a good stretch.
  • Bend your left knee, as your right leg straightens. Hold this for as long as it feels like a good stretch.
  • Bend one knee at a time as you move with your breath, and do this for 3-4 times on each side.

Parsvottanasana with Blocks (Pyramid with Blocks)

*Bring your blocks to the top corners of your mat.

  • From Uttanasana, step your right foot back, and bring your right heel to the floor at a slight angle.
  • Step your right foot slightly wider.
  • Bend your left knee, so that it is stacked over your left ankle.
  • Take your hands to the blocks.
  • Lift your hips up, and send them back while you straighten your left leg.
  • Move your blocks and /or hands back so that your wrists are under your shoulders.
  • Keep your hips square, and be sure to draw your left hip back as your right hip wraps forward.
  • Lengthen your spine as your heart reaches forward, and then fold over your left leg. Adjust your hand placement if needed, and /or change the height of your blocks.
  • Press firmly into your back (right) foot.
  • Hold for 5-8 breaths.
  • Bend your left knee as you walk your hands forward.
  • Lift your right heel, turn your toes to face the front of your mat, and step your right foot to meet your left.
  • Stay in Uttanasana (forward fold) for a few breaths, being aware of how your left hamstrings feel in relationship to your right.

Repeat on the other side.

  • From Uttanasana, bend your right knee and walk your hands around your right foot.
  • As you do this, straighten through your left leg.
  • Continue to walk your hands to the right until you feel the desired stretch through the left hamstrings.
  • Hold for 5-8 breaths.

Bring your hands back to centre, and repeat on the other side, bending your right knee, and then walking your hands around your right foot.

Ardha Hanumanasana (Half Splits)

  • From Uttanasana, step your left foot back and lower your left knee.
  • Straighten your right leg by walking your foot forward, 6-8 inches.
  • Take your hands to your blocks and then draw your hands towards you until your wrists are underneath your shoulders.
  • Lift up through your chest and stay light on your fingertips.
  • Flex your right ankle as you draw your toes away from the floor.
  • Draw your right hip back as your left hip wraps forward.
  • You can stay upright through your torso, or hinge from your hips to fold over your right leg. Feel free to change the height of the blocks as you fold, depending on your depth.
  • Hold for 5-8 breaths.

Slowly lift your chest, move your hands and / or blocks forward, bend into your right knee, lift your back knee, and step your left foot forward.

From Uttanasana, repeat on the other side.

Savasana (Corpse Pose)

  • Lay down on the mat.
  • Reach your legs long in front of you as you draw your shoulders away from your ears.
  • Let your body relax into the mat.
  • Stay here for 2-5 minutes.
  • Slowly move your body, roll to one side, and press to a seat.

When you stand up, take note on how your hamstrings feel. You might even notice that as you bend over to roll your mat or pick up your props, your legs feel more spacious. Enjoy this flexibility and come back to this routine any time your hamstrings need some love!

Yoga for Knee Pain

At some point, most of us will experience knee pain. The knee joint is essential in propulsion and weight bearing and experiences a lot of wear and tear over a lifetime. My knees first started getting angry at me from over twisting the joint in ashtanga yoga, then got angry when I started wearing a heel lift (that was a mistake!), and again flared up when I did too much jumping at a dynamic yoga retreat. Oops. Our knees – sweet little modified hinge joints that they are – are subject to forces both from our hips and from our feet. When things go astray in the ankle/calf or the hip, the knee can suffer.

View of knee from top

In addition to an acute impact injury, knee pain can be caused by a wide range of factors:

  • wear and tear over time and wearing down of connective tissue (arthritis, inflammation)
  • bursitis (inflammation of bursa through friction or pressure)
  • meniscus injury (small cartilaginous discs in the knee that are injured often through twisting at the joint)
  • ligament tear (you have 4 major knee ligaments, including the ACL, which may be torn or severed through impact and abrupt twisting)
  • patella pain (the knee cap is pulled “off-track” from it’s happy place)
  • tendonitis (the quadriceps tendon that holds and slides the patella against the front of the joint is inflamed and irritated)
  • hypermobility, where the connective tissue around the knee is too loose and permits structures to move inappropriately
  • IT band tightness (the connective tissue band that runs along the outside of the thigh to the shin becomes overly tight, causing pain or rubbing the femur bone)

To manage your knee pain, you must first go see your doctor or your physiotherapist to understand why your knee hurts. Clearly, yoga will not be helpful for your if you have an undiagnosed ACL tear. Also, someone who is hypermobile will need different physical medicine than someone who is chronically tight. However, if you are a relatively healthy practitioner looking to maximize the good effects of your yoga practice for your knee, then here are five tips for practice to protect this essential joint.

1. Don’t do crazy poses

Yoga has lots of nutsy hip opening poses like lotus or hero’s pose, where you bend the knee and then rotate your hip. While hip opening is one of yoga’s benefits, sometimes practitioners will over-enthusiastically transmit that hip twisting into the knee. That’s a no-no. The knee – although it’s a modified hinge joint and can twist – generally likes to be treated like a pure hinge joint. When you’re practicing positions like hero’s pose, pigeon pose, or lotus pose, make sure to treat the knee like a pure hinge joint. Pretend you can’t twist it. That will help you keep the forces aligned through the joint effectively.

2. Stabilize

Purvottanasana (stretch of east)

The muscles surrounding the knee stabilize the knee. Strengthening your hamstrings and quadriceps can help your knee to function better. Poses like purvottanasana (stretch of the east), bridge, and locust can help strengthen the hamstrings and glutes, while poses like chair, utthita hasta padantusasana A (without holding the leg up) and standing warriors can help strengthen the quadriceps. (A caveat here: strength training exercises such as squats and bridging may be more effective for you than yoga. I love yoga, but it’s not a universal panacea.)

3. Mobilize

Cobbler’s pose, baddha konasana

Overly tight quadriceps, hamstrings, and IT bands can also cause problem. Issues can also arise from tight calves and tight hips (the tension transmits through the connective tissue and affects your knee). Yoga is an excellent practice for supporting mobility. Try these:

Glute/hamstring opening:

Outer hip stretches (IT band, piriformis):

Inner thigh/groin stretch

  • happy baby
  • lizard pose
  • wide legged forward fold
  • cobbler’s pose
  • janu sirsasana

Hip flexor/quadricep stretches

  • high lunge
  • low lunge
  • saddle
  • thigh stretch

4. Avoid unsupported hyperextension

Check out the front leg hyperextension! Back out and engage the muscles around the joint.

If you are hypermobile (can extend your joints beyond straight), it’s very easy to “sit” in your joints without engaging your muscles. Rather than fully extend your joints, keep a slight bend so that you must engage the muscles around the joint rather than rely on ligamentous stability. Watch in in poses such as the following straight legged poses:

  • triangle
  • pyramid
  • standing forward folds
  • warrior 3 (standing leg)

5. Avoid pain, unless directed

There are different kinds of pain. The discomfort that you encounter when you stretch your overly-tight IT band is intense and teeth-gnashy. This, however, is good pain and is useful for your functionality. However, the sharp pain that you encounter in your inner knee when you squish your meniscus is bad pain. If you are encountering pain and you don’t know what it is, then you need to go see your physiotherapist or doctor and find out what is going on. Once you are empowered with this information, you can more effectively use your yoga practice as a tool for improving your strength and flexibility. Until then, listen to what your knee is saying and avoid movements that create or increase discomfort or pain levels.

We love our knees, and want to be practicing with them for a long time!

Happy practicing!

How Do You Do Yoga At Home

Practicing yoga has never been more accessible! But even so, getting a yoga at home practice started isn’t always easy. Here are five tips to get you started.

1. Create a practice space

Your home practice space doesn’t have to be fancy. While it’s luxurious to have a designated space that’s only for yoga, your practice space will probably double up as something else (for example, when I practice at my sister’s, my “sacred” practice space is actually the living room floor!). If you’re able, de-clutter your space and add something that brings you a feeling of zen (a candle, a picture, a plant). Putting a little energy into your space will help it feel special and important.

Having a designated practice creates an imprinted memory. Over time, as you practice in that same area, you will create some good energy there, making it easier for you to transition into a zen mind state.

2. Don’t sweat the props

Yoga studios have lots of fun props – bolsters, block, and straps. At home, use pillows, books, and towels instead! In fact, you don’t even need a fancy mat (I’ve been known to just practice on the carpet or to throw down a big towel). The wonderful thing about yoga is that there is nothing that you need to make it happen. You only need yourself.

3. Get a team

The hardest part of your home yoga practice is just starting! However, these days, it’s easy to put a team in your back pocket. With so many free online resources (like Do Yoga With Me, for example, where I teach), you can easily find a class that fits into your life and your skill level. If you’re not sure where to start, try a beginner level class.

Here are a few of my classes you can check out right here:

4. Start with five minutes

Your yoga practice can be just five minutes long. That’s it! On days when you feel busy or overwhelmed, just make it to your mat and commit to five. Often when we start a mini-practice, we realize that all the crazy voices in our heads (“You don’t have time,” “There’s too much to do!”) are simply anxiety voices. They often fade when we simply take a few deep breaths. And if you really only have five minutes, then great. In my experience, a quick 5-10 minute practice can be as profound and nourishing as a longer practice.

5. Let yoga fit your life

People often ask me questions like, “when should I do a home yoga practice,” “how long should I practice,” “how often should I practice yoga at home?” The answer is, “when you can!” Yoga can fit into your life and support what you need. Your home yoga practice can look like many different things:

  • a ten minute wake up practice in the morning
  • a twenty minute practice after you get the kids to school
  • a thirty minute practice on your lunch break
  • a fifteen minute practice to get ready for bed
  • a 75 minute Saturday afternoon practice

The yoga practice can fit into your life, beautifully. There’s no “right” way to do it. Feel free to ask me any questions, and happy home practicing!

Yoga Practice for Back Pain

“So what brings you to yoga?”

“My back!”

So many of my students have started coming to yoga to help with their back issues – and for many, it’s helped! While there is no specific set of yoga postures guaranteed to fix an unhappy back, yoga can often help alleviating some of the triggers that lead to back pain. (Check out this article from one of my favorite physios: Is Yoga Really Good For Your Back.) Caveat: yoga is like any medicine: the wrong dosage for the wrong ailment and medicine can become poison. Dealing with injuries require patience and love. So if you have back pain, see your physio and make sure that the following exercises support your health.

Movement and exercise in general – whether you’re walking, lifting weights, rock climbing, or doing hatha – is good for you on so many levels that it’s almost like swimming in a fountain of youth. What yoga does very well in particular is facilitate low-impact mobility and stretching. The following poses help to both stretch and strengthen your back and hips.

1. Downward dog

Downward facing dog with assist

Downward dog is the ultimate happy back pose. When done properly, it puts the back into mild traction through the opposing action of the arms and legs. Now if you’re a beginner, or have really tight hamstrings, then I’m going to suggest that you do downward dog at your kitchen table. Put your hands on the counter, walk back until you make an “L-shape” with your body. Then press your hands firmly, stretch your chest towards your hands, bend your knees a titch, then pull your hips back into the center of the room. Actively pull yourself in two directions. Like you’re on the medieval rack, but this time it’s nice. What we’re going for here is some decompression through the spine. As a bonus, we get a hamstring and calf stretch. Hold for ten (long, slow) breaths.

2. Hamstring stretch

Supta hasta padangustasana. That’s a mouthful.

Yes, this old chestnut! The hamstrings can sometimes pull your pelvis under, which puts your spine in an unhappy position. Stretching them out can help relieve some of this pull through the back line of your body.

Pictured is my favorite way to do this stretch, because your spine is supported by the floor. That’s nice. Use a strap (or tie, or towel) around your foot. Keep you right hip anchored down and REACH through your heel to STRETCH the back of your leg. Hold for 2 minutes. Yes. 2 minutes. Set a timer. To the get maximum impact out of this, add a little quad work and really try to straighten your leg.

3. Figure four/ thread the needle

mild version
deeper version

Figure four stretches your outer hips, which can often get tight and cranky.

your outer hip muscles: glute max, medius. Minimus is hidden under there, as is piriformis.

Either these muscles are weak and cranky because you haven’t been using them enough, or they are tight through lots of use (that’s my joggers, hikers, bikers). So if you haven’t been strengthening these guys, I’ll suggest that you may want to visit your friendly personal trainer or physio and see if they’re working the way that they should.

4. Locust

A little back strengthening is in order! Locust pose strengthens your spinal extensors. And the good news is, there’s a variation for everyone. Use a strap (or leave your hands unbound) if you have any shoulder issues. Reaching the arms forward is more challenging; this this with discretion. Also, this is a rather low-key, strengthening backbend; “bigger backbends” aren’t better and in fact may not work for all bodies. Do five sets, holding each repetition for 3-5 breaths. You will feel your back engaging, but if you feel any sharp pain, choose a more moderate version or leave your legs down.

5. Back stretch, child’s pose

Nom nom. Rest your hips back on your heels and BREATHE into your lower back. If this is too intense or hard on your knees, take happy baby instead:

Basically, we’re looking for a stretch that gently widens and spreads your back. (If you’re more flexible, a rag dog forward fold can also fit the bill). I like happy baby because it also helps to open up the adductors (groin) muscles.

Conclusion

Functional fitness is about small daily acts. It’s about showing up every day – even if it’s just for 10 minutes – and taking care of your body. This is a perfect little wind down for the end of the day, or a good mid-afternoon stretch (I don’t recommend stretching in the morning; we’re too tight from sleeping). Also, join me on Do Yoga With Me (it’s free!) for some practices that can support back happiness.

Check out the new yoga conference coming to Germany!

This week I caught up with Anastasia Shevchenko, founder of the Berlin Yoga Conference which is coming to Germany this May 24-26, 2019. Anyone have a hankering for Europe in the spring?
Anastasia Shevchenko is the founder and the managing director behind the Berlin Yoga Conference and is a freelance yoga teacher. She is a proponent of authentic yoga experience for self-healing and self-transformation. Her special interest lies in the creation of bridges between yoga, philosophy, science, art, and spirituality. Anastasia’s newest passion is to teach yoga teachers how to best apply themselves in this industry.
As a gesture of appreciation, Ana is offering our community a 10% discount on tickets! Promo code: Rachel-yoga

1. Tell us about this conference – why did you create it?

I put together the Berlin Yoga Conference coming May 24-26 2019 because I wanted to create a transformation space for people to experience yoga in an authentic and life-changing way, no matter what level of practice or personal background. This is why all yoga methods are celebrated, without emphasizing any specific one over others, and there is a strong focus on modern yoga philosophy and its connection to the sciences, although the yoga tradition is respected and put into a proper perspective.

Moreover, I wanted to create conditions for socializing, making friends, networking, and just meeting and connecting to people, with or without any specific goals in mind, enjoying the cultural and musical programs together, the communal food breaks, learning and getting inspired from each other, joining and enriching this expanding international yoga community. This basically covers the motto for the Berlin Yoga Conference: Breath – Learn – Connect.

2. What can visitors expect?

I don’t like the word “expectation”, because it almost always involves some kind of faulty precognition, which then makes it more difficult to experience the true present moment in all of its richness. Of course when one is looking at the website and making a decision whether to come or not, one naturally makes some kind of guesses about what the event is going to be about and if it is worth coming or not!
All I can say that at this point is that I’m trying my best to create and communicate a set of circumstances that are behind the project: the vision, the goals, the venue, the presenting teachers, the program, but how it will all play out at the Berlin Yoga Conference in May 2019 is ultimately a mystery, and I would like to leave room for this mystery to unfold and for true magic to happen. I’m absolutely sure that everyone who comes to the event will experience what they ought to experience, depending where they are on their yoga path and what lessons they need to learn about themselves and others.

3. How is this conference different from other events?

Since the Berlin Yoga Conference will happen for the first time in May 2019, it’s hard for me to speak about how it is “different” from other events – since it hasn’t happened yet. However, we did run already two pop up events in the frames of the conference in May, and they were very special events, according to the energy in the room and the subsequent positive feedback that we’ve got. First, each event featured high-quality programming that was very well though-out in terms of the flow and the fit, as well as in terms of the person leading the sessions. Second, these events came across as were touching, moving, and inspirational, across various yoga methods and formats (yoga workshop, meditation sitting, panel discussion, healing session, performance, and communal meals). Third, the community bonding element always did it’s job: people were gently motivated to leave their protective shells behind, and to naturally open up to others, without being forced or persuaded to do so in a “open your heart” kind of way. For me personally, this last point is very important.

4. What makes this conference unique?

To me, it is this sacred transformational community space that I’m set out to create (and that I have created at the Pop up events previously). Coming from a personal background of migration (Ukraine -> Canada -> Germany), living between cultures, languages, and different value systems (Socialist vs. Capitalist), having cured myself from scoliosis and a broken and paralyzed arm, my yoga path was characterized by self-healing, self-empowerment, and subsequent self-transformation. Now, I’m ready to share what I learned, and also to create a space for others to share what they have learned, in a safe, inclusive, diverse, open-minded, well-organized, well-though out (with attention to detail), and friendly kind of environment.
I think of course that the person behind the project has a very strong influence on setting the intention, values, and culture for the project, but I see my task primarily as that of being a hostess, a “holder of space”, a reader of faces and energies, and this is why I decided against teaching at my own event, so that I can dedicate myself entirely to others.

5. What do you think the future of yoga is looking like in Europe?

Wow, that’s a truly great question that I haven’t been asked by anyone yet, and I really appreciate it! I’m so blessed (or cursed, depending on the day) to work on this project and to learn about the yoga industry on the local, national, and international levels. Because I constantly try to connect and collaborate with people, I get a pretty good sense for where the yoga community is at these days: what are the challenges and what are the really cool and inspiring developments. So to answer your question, here’s what I think based on my experiences so far:
  • I see a tendency towards working with the pool of local teachers that are not “international” yoga stars, because the local teachers have much value to offer and are more pleasant to work with, while the “yoga stars” command fees that are too high for the European market. Sure you will still have a couple of very well-established teachers giving workshops here and there, but these will be the people who will have to adopt to the new circumstances and humble down.
  • I think that the Instagram Influencer days are almost over and that the concept is outliving itself and is becoming boring. People are tuning out of the same old pictures of handstands on the beach or arm balances on the top of a mountain, with some quote pasted on top of it and sponsored yoga clothing. On top of that, the new algorithms are making it progressively more difficult to reach people “organically”, and the companies are cutting down their “influencer” budgets.
  • I’m guessing there will be more and more yoga methods and styles created, with all kind of fusions and cross-disciplinary connections (yoga and dance, music, Eastern philosophy and various healing modalities, fitness directions, etc), because of the need of the teachers to, on the one hand, create a unique offer and occupy a niche in the market, and on the other hand – to express themselves creatively and according to their personal background, talents, and skills.
  • I am positive that because there are just too many (and constantly growing in numbers) yoga teachers out there, there will be many more products and services geared towards them and they would quite naturally have to find others ways of supporting themselves by maybe creating their own yoga brands, products, and services as well. There will be an expansion of yoga entrepreneurship and more funds available to this cause, since it is a booming industry, and all-in-all, that’s creating a positive change for the world, in many ways!

6. How can we find out more?

  • For information about the project, the presenters, and the programming, the best is to access the website.
  • To really get updates, news, and exclusive discounts, the best way is still the Newsletter
  • For cool features on the presenters and the programming: Facebook & Instagram
  • And for any questions and offers to work together, always per e-mail: info@berlinyogaconference.org

Live Your Yoga: Making A Decision, Part 1

I have struggled with decisions. Especially the big ones.

Questions such as:

  • should I be a single mom
  • should I stay in this relationship
  • should I leave my job
  • should I end this friendship

Even if we’re not up against a “major” life decision, we face a myriad of choices every day. We all want to make “good” choices. But what does that mean? And how can our yoga practice help?

In this three part blog, we’ll look at the three tools that are unveiled in the The Bhagavad Gita, one of the yoga tradition’s most beloved texts. The Gita is a smaller part of a huge epic called The Mahabharata. 

To set the stage, in the Gita, our hero, Arjuna, is a warrior who is faced with a terrible decision: should he take up arms and fight a battle against his own family? Although his cause is just, the destruction will be great.

Arjuna is our everyman. Just as him, we too are embroiled in our own daily battles. Right now, think of a battle/choice that is currently in your “field.” Pause for a moment to consider your quandary. In our conflicts, the “right” choice is often obscured in ambiguity. All options seem terrible. The outcome is uncertain. How do we choose? And how can we be yogis when our actions may create pain?

Arjuna’s first instinct is to simply not act. He throws down his weapons. (Can you relate to this desire?) Arjuna turns to his friend, Krishna (a god), who is his charioteer to beg for guidance. Once Arjuna has opened himself to instruction, Krishna lays down some wisdom to help guide Arjuna to his best path. Through the Gita, Krishna lays out three paths for being a practicing yogi in the world.

Krishna represents our higher power, our inner voice of wisdom, our inner sage. Even in the midst of battle – perhaps most keenly in the midst of battle – we can uncover our highest self.

Path 1: Jnana Yoga

Simply stated, know your true self.

You are not your thoughts, your feelings, your body, or your ego. You are not the habitual thought/feeling patterns that make up your personality. Rather, the True Self is the power of Consciousness that lies behind all of these mini-dramas and fluctuations. Imagine that you have gone to a movie: as a spectator, you are caught up in the the drama of the story. But that personality on the screen is not you. While that little character is having its dramatic escapades, you are safe in you chair, watching. Your true self is the Witness, the Seer, the Observer.

Try it. You may set a 5-minute timer.

  • Come into a meditation seat and close your eyes.
  • Start to watch your thoughts and feelings arise and go.
  • Can you create space to watch them arise, without getting caught up in them?
  • Who is the Watcher?

When you can begin to watch your thoughts, you will begin to realize just how compulsive your mind actually is! It chases its own tail: reliving victories and defeats, anxiously scrabbling for control, and “hamster-wheeling” through thought cycles. The mind constantly compares. It creates names, labels, judgments and patterns. However, as soon as our minds begin to dissect reality, we lose our ability to experience the totality of what actually IS. Our minds are too busy comparing what we’re experiencing to everything that we have already experienced to take in the present moment unvarnished.

Try this: open experiencing.

  • Take yourself on a walk, preferably outside.
  • Breathe. Take in the world through your senses as it is. You will need to slow down.
  • Experience the world freshly, avoid stories and labels.
  • Stay in the space of open experiencing, without expectation or interpretation.

Once you have settled into the space of the Experiencer (rather than the experience), consider: how does your battle feel now? From your higher perspective, what choice is the most elevated?

Stay tuned for Part 2.